 This is a handyman tip that will save your knuckles from looking like hamburger. At some point it will happen that you will put all your might into removing something from the end of a pipe…it could be a cap or a valve. Rather than risk the wrench slipping off of the cap and you skinning your knuckles, use a little physics to save your skin.
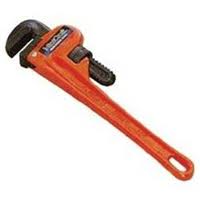
Use The Right Wrench
Using the right wrench for the job helps a lot. If you have a nut with machined sides on it, use a wrench, like an open end wrench, that doesn’t adjust. Adjustable wrenches, like crescent wrenches have too much play in them and this will wear down the corners on the nut and will slip, leaving you with skinned knuckles. A large wrench made for this particular use goes a long way in getting the job done.
Use Opposing Force
Instead of using a wrench and throwing all your strength into it, try using two wrenches. Let’s take the example of removing a threaded cap off of the end of a pipe. For this I would use two pipe wrenches, as the cap will have a couple of lugs to hold on to. To remove the cap, place one wrench on the pipe itself close to the cap, with the opening facing up. This wrench would be in the 9 o’clock position. The other wrench would be on the cap with the opening facing down in the 10 o’clock position. Positioning the wrenches in this position allows you to hold both wrenches in your hands while you squeeze. Obviously, you want to squeeze more on the wrench on the cap while holding the pipe still. This may sound a bit confusing, but once you position the wrenches it is easy. You just want to get the cap to move and the larger the wrenches, the more force you can leverage on them, all without skinning your knuckles.
 Is your handyman an unreliable flake? I can’t tell you how many people call me telling me their stores of how long they have been waiting for “their” handyman to show up, and that they are ready to try someone new. Then it seems, once the flake hears that their customer is going somewhere else, they drop what they are doing to finally race over in an effort to keep them. It’s really funny. It is almost like a breakup, and then one party gives in and does what the other wants.
The question is why? I guess that people resist change, even when it will help them. If someone is not doing what you need them to do, there are plenty of others that will. As you might have guessed, I am often the guy that the flake’s customer is calling to come over to do the job. Then at the last minute the customer will call me and cancel citing that their handyman finally showed up. I mean, if you can even get the guy to show up, how can you expect him to come back and complete the job the following day? It is amazing and confounding, how a perfectly reasonable homeowner will continue to allow themselves to be a victim of an unreliable handyman, over and over.
 If you have ever done any kind of handyman woodworking project, you occasionally need to secure wood together with screws. Screw heads are not the most attractive fasteners in the world, so it makes sense to cover them and try to make them blend in. You can do this with wood plugs.
You will need to recess the screw heads into the wood with a tapered counter sinking bit. Once you pre-drill the hole and make sure the countersink is both deep enough to cover the head and get a plug to fit, you can get a plug. The plug should be the same species of wood and the correct size to fit into the countersunk hole. You can either buy plugs or make your own with a plug cutting bit.
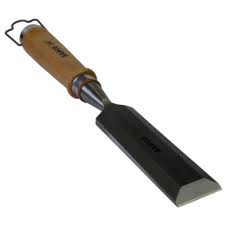
Gently tap the plug into the hole. You can cut the plug flush with the surrounding surface by holding a sharp chisel at an angle and cutting it off with a slight tapping motion. You can also use a hand plane and run it across the surface a few times to level it out. You might be able to tap the plug in gently with a hammer and set it so that it is flush with the surrounding wood. Then you can stain or paint all the surfaces so that they blend in.
 The next time your handyman is over, ask him to check on your appliances. Appliances should be balanced and level for them to operate correctly. In addition, they look better too. You may not have even noticed, but appliances have adjustable feet that allow each corner of the appliance to be raised or lowered. If you have noticed that your washing machine walks across the floor when it runs, here is an opportunity to fix it.
The adjustable feet screw in or out to raise or lower the appliance. If you want to lower the appliance, screw the feet clockwise which draws the feet closer to the appliance and lowering it. To raise the height of the unit, turn the feet counter-clockwise which will put more distance between the appliance and the floor.
Most of the feet have a nut right above them that allow you to place a wrench on and move the foot in-or-out. Depending on the type of flooring you have, this may not be a good idea. With the full weight of the appliance on the foot, you will be turning it and potentially scratching the floor. Instead, try lifting up slightly on the appliance (if possible) to take some of the weight off. You can probably just use your fingers to move the foot.
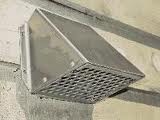 So why would you want a handyman to install screening on exterior vents, such as a dryer vent? To keep things out that you don’t want to get inside your house. It’s not even so much as getting in your house as getting in the vent. Things like rodents and other pests love small areas that they can climb into and get shelter and warmth. On a cold day, I’m sure a nice warm dryer vent is quite the place for a rodent to hang out. It’s also not a place where you want bees to build a hive.
Many vent terminations have screens already installed for this reason, but plenty of home inspectors find otherwise. And that is where some metal mesh will save the day. You can buy this type of screen at most home centers where they sell chicken wire. You don’t want chicken wire though as the holes in it are too large. You can buy the mesh with openings of approximately ¼” x ¼”. Take a quick measurement of the opening in the vent and cut the mesh large enough so that you can wrap it over the ends of the vent and screw it in. You can use self tapping screws with pan heads. These large heads will allow you to tighten the screw as the head of the screw holds the mesh to the vent.
 Here is an easy handyman tip to prevent scratches caused by furniture on your beautiful wood floor. Furniture has a way of moving around somewhat, especially if it gets bumped around. Things like a desk or a dresser that has drawers will move slightly when you open and close them. Hard surface floors like wood or laminate are smooth, and depending on how much force is exerted in the opening and closing action, you may get scratches on the floor
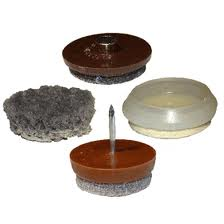
You can prevent this by padding the feet of the furniture. You can buy small padded rests for the desk or piece of furniture. Depending on what type of wood the furniture is made of, it may be easy or tough to get the feet in. Most of these will have a spike coming from the center that enters the leg or base of the furniture. I wouldn’t tip the furniture over to install these, rather enlist some help from someone to lift one side of the furniture so you can tap the foot into place. Most furniture is made of particle board and so you can probably get the point of the spike into the piece and let the weight of the furniture sink it in. These feet are small and shouldn’t be very noticeable.
If the leg of the furniture is solid wood, I wouldn’t chance hitting the entire length of the spike into it, for fear it may split the wood. Instead, you can grind the spike down to a length where it just enters the wood and holds.
 It isn’t a common handyman job, but gas lamps occasionally need servicing. Just like in a camping lantern, the mantles will eventually get jostled around to the point that they get damaged and need replacing. Vibrations and bumps can cause the mantels to break as they are very fragile.
On permanent gas lamps, there will be a gas line run underground that supplies the fixture. Somewhere on the post will be the valve that stops the flow of gas to the fixture (typically inside the post behind a door that removes). You will need to turn off the gas valve to stop the flow of gas to the head.
Let the fixture cool down and then remove the glass pieces (now is a good time to clean them). You can remove the mantels by slightly turning the ring and pulling it down (fixtures can have either one or two mantles). Install the new mantles in the reverse order of removing them.
You can replace all the pieces of glass except one which you will leave open for access to the mantles. With the gas still off, light the mantles and let them burn until they turn to ash. They will be very fragile at this point. Wait a few minutes and then turn the gas on. Hold a match to the mantles and they will ignite and glow. They will also fill to their normal shape. Replace the last piece of glass back into the head and you are done.
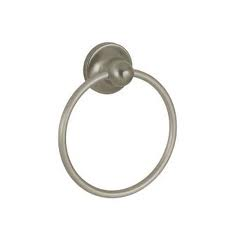 Installing a towel ring is a handyman job that is almost identical to installing a towel bar. Obviously the big difference is that there is only one mounting point rather than two.
If you can install the towel ring directly into a wall stud, you will have great holding power. However, it is usually my luck that there isn’t a stud where I need one, so that leaves me with installing the ring into the drywall.
You can use a toggle bolt or an EZ Toggle to secure the bracket to the wall. If the bracket that comes with the ring has several holes in it that would allow you to use 2 toggle bolts, then use two of them. You can use 2 small toggle bolts and that will minimize movement of the ring. The towel ring will have to support the weight of the towel, as well as pulling action by people using the towel.
Hold the bracket to the wall and make some marks where you need the holes drilled. If you are using an EZ toggle, they have a point that will bore into the drywall by itself. If you are using toggles, you will have to pre-drill the hole for them.
If you are using the EZ toggle, once you have screwed it into the wall, place the screw throught the bracket and tighten it into the piece in the wall.
For regular toggle bolts, thread the screw through the bracket and twist on the toggle on the end. Squeeze the toggle closed and push it through the hole until you hear it snap open. As you tighten it, pull the screw head away from the wall and it will draw the bracket to the wall. Then just place the towel ring onto the bracket and tighten the set screw.
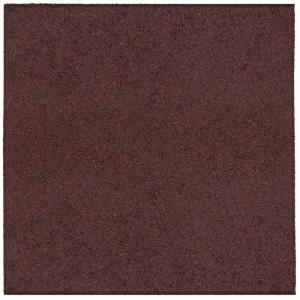 Make no mistake, this handyman job is hard work. The end result will be an attractive functional area. Whether you are going to do a patio or a walkway, the process is the same.
Use washed sand and build a base of several inches. Level the sand with a screed and then you can start setting the pavers. Planning plays a big role here. If you are using pavers that are uniform in size, it is easier that if you are using various sized stone pavers. You will need to use some type of edging to hold everything together if the space is not confined to a specific area.
Set the pavers into the sand with a slight twisting motion. You can have uniform spaces in between each paver or different spacing if the pavers are different sizes. You can run a vibrating tamper over the pavers to seat them and remove any small voids.
Once the pavers are set you can fill in the areas between the pavers with washed sand. There’s nothing scientific here…just dump some sand on the pavers and use a push broom and push it around filling in the spaces. You can run the tamper over the area again and sprinkle some water over it to remove any small spaces and to get the sand to compact better. You can do this a few times.
This will turn into a maintenance project every so often as well. Especially if you have children…they love to dig into the sand.
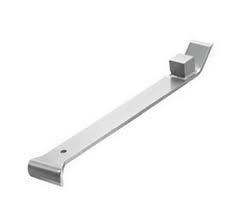 As a handyman I have lots of tools. For installing laminate flooring a must-have is a pull bar and a scrap block. As you start along one wall, the first coarse of laminate planks go in easily. It’s the next many courses that may prove challenging.
You will cut off the length that is too long at the end of your first coarse, and use that piece to start your second course. This works out perfectly since you want to stagger the seams of the planks, so the off-cut will stagger the seams by the length of the off cut. What this also does is instead of just mating along the one long side of the plank, the pieces will also mate along the short edges. Since the planks are likely tongue and groove, you will need to angle the piece, push it in, and snap it together. That’s fine for one side, but not-so-much with two sides.
The answer is a pull bar. This is a metal bar with a 90-degree arm on it that allows you to set the bar over the edge of the plank and tap it into place. I usually snap the short end into place with the long edge just touching the mating piece. Use a sacrificial scrap block and place it over the edge of the piece you are installing. The scrap only has to be as wide as the pull bar’s surface. Lay it all down, make sure it is flat, and tap the par to pull the planks together. You will have to do this gradually every foot or so along the length of the plank to gradually pull them together.