 The answer to the question of whether or not a clogged shower drain can cause a leak is that I guess it depends. Generally speaking a clogged drain won’t cause a leak. However, I can imagine times when there are secondary causes that are associated with the backup of water.
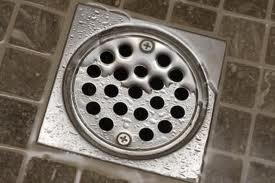
Regarding a shower drain, as the water backs up back into the shower pan and begins to rise, if it gets high enough, it may creep into back into the wall if there are voids in the caulking or grout.
The backup of water will likely put extra stress on the joints as well. Not that the joints won’t hold up, but they are not normally under pressure. It’s similar to when you plunge a drain…occasionally a joint might be disturbed to the point that it leaks, but it isn’t common enough to worry about.
Toilets and sinks are the same way. If a toilet backs up, it can certainly overflow on to the floor and cause problems downstairs. For a bath sink, there is an overflow drain that should take the water to the drain, but if the drain is plugged it can overflow. I’ve also seen the overflow channel below the sink leak as many of them are plastic and are not secured very well. So generally I would say a clog won’t cause a leak.
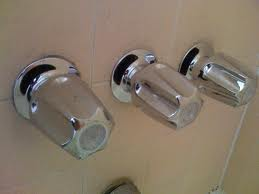 A customer called asking for help on an old shower valve. He has three handles: one for the hot water, one for the cold, and a middle knob that shifts the water from the tub nozzle to the showerhead. The problem is that the middle knob didn't fully shift the water, so he would end up standing under a drizzling showerhead while lots of water flows out of the tub spout.
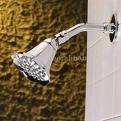
Many newer showers use a single-handle shower valve and a tub spout diverter, rather than a diverter valve in the wall like you have. Getting replacement parts may not be as easy as going to a home center, so you will likely have to make a trip to a plumbing supply store. Before you replace the stem assembly, you might try to repair it first. The problem usually lies in the washers at the rear end of the stem, but getting access to this part can be tricky.
You will first need to turn off the water to the house and disassemble the valve. You can remove the diverter handle by the screw in the middle of the handle, which is hidden underneath a cap (it just pops off with a screwdriver). Then unscrew the escutcheon cover to reveal the stem assembly.
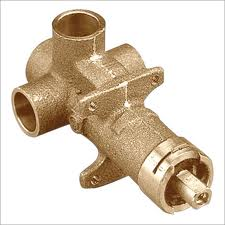
Getting the stem out can also be tricky. It is usually recessed inside the wall and it has a large nut (called a bonnet nut) that holds it down. The problem is that there is usually very little space between the bonnet nut and the wall surface to get a wrench around it. If the nut sticks out slightly from the wall, you may get lucky and be able to twist it out. However, you will usually need to get a deep-set socket, which can get by the tight clearance and remove the stem.
Use gradual pressure and twist out the stem, but remember this has been in place for years and won’t react kindly to a sudden pounding. If you get really nasty with it, you could damage the old solder joints and really spoil your weekend plans.
With the stem assembly out, you can take it to a plumbing supply house for a new one or you might be able to clean it up and replace the washers. If you feel like repairing it, grab two wrenches and twist the stem free of the bonnet nut. You will be able to see and replace the washer on the bottom of the stem. It is held in with one screw and you should easily be able to find an exact duplicate (or in a pinch you can turn it over for a fresh surface).
While you have the assembly apart, use a small wire brush and clean off any sediment or buildup. You can use vinegar or a lime remover and give it a gentle cleaning.
Reassemble the pieces and screw them back together. You may need to add some Teflon tape or packing to the assembly if it leaks, but when you use your shower again, you should get more water on your head than on your feet.
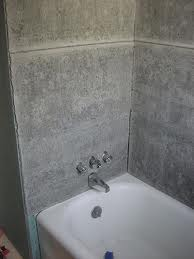 For shower wall repairs, it is a pretty common issue to wrestle with: should you use cement board or green board? There are benefits to each, but I am partial to cement board.
I like cement board because it is so durable. The downside is that it is more expensive, it is sold in smaller pieces (3’x5’ sheets that makes it easier to handle), it is slightly more difficult to cut, and the fasteners are more expensive.
Green board on the other hand has just the opposite of the drawbacks listed above. Green board though is often referred to water proof, which it is not. It is water resistant. It has a waxy surface which can resist wetness, but it is definitely not water proof. It is smarter to use green board than ordinary drywall when working near wet locations.
Both cement board and green board are cut using a score and snap method. The edge for the cement board will be much more jagged than the green board, but since it will be covered by the shower wall surface, it shouldn’t make much of a difference. Since the cement board is heavier, you will also use more screws to hold it to the wall studs. These are specialized screws with small burrs under the screw head that dig out some of the cement surface so that the head will not protrude.
 A shower valve can certainly cause a leak downstairs. It may not be the valve, however. You may need to do some investigating to figure out the cause and then the solution.
If you suspect your shower valve is leaking and causing damage downstairs, instead of cutting the ceiling open, first remove the escutcheon plate covering the valve. You will have to remove the handle to pull the escutcheon away. You can use a flashlight to look into the wall and check the valve. If the leak is coming from the wall, you will want to check for leaking water from the riser up to the shower arm. Remove the shower head and cap the shower arm, then turn the water on. This will pressurize the piping and if you have a leak here, you should see the water.
You might also look for a leak at the handle area and the possibility that water is running back into the wall.
Most of the ceiling leaks I see are the result of drains. Whether the connection from the shower drain to the pipe is bad, or that there is a loose or damaged fitting, the drain line is often the problem. You may not be able to tell where the leak is coming from until you open the ceiling. Water will take the path of least resistance and it may be coming from 5 feet away, running down various obstacles in the way and finally dropping onto the ceiling where you see the stain.
 If you have a single handle shower valve, and water runs out of your shower head when the knob is turned off, you should replace the cartridge. What if you replace the cartridge and it still leaks or drips?
On a single handle shower valve, there really is only one part to replace…and that is the cartridge. There are a couple possibilities that may explain the leak.
The cartridge is a cylindrical part with a variety of o-rings and rubber pieces on it. The fit is snug. It may be that as the cartridge was pushed into the opening an o-ring may have twisted and allows water to pass. It may also be that the cartridge is bad. In any case, you will need to remove the cartridge.
Once you have the cartridge out, inspect it for defects. It really doesn’t take much for water to pass. Look for tiny defects or nicks in the rubber parts. Also look for cracks in the plastic housing. If everything looks fine, rub some liquid soap on the cartridge and slide it back in. The soap acts as a lubricant and so the part should go in very easily. If it still leaks after this, replace the cartridge with a new one…there are times that you won’t be able to see the problem even if the part is new.
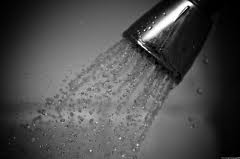
 I get calls all the time for plumbing leaks. A shower head is one of the most common calls. So the question becomes: is the shower head dripping when the water is turned on or when the water is off?
This is an important question because it determines what the root cause of the problem is. If the shower head drips when the water is turned off at the handle, then the valve in the wall is not stopping the water from passing. So it slowly makes its way up to the shower head and drips out. If the shower faucet has separate hot and cold handles, feel the dripping water to see if it is hot or cold. The temperature of the water will tell you which side you need to work on. Whichever side it is, you can replace the stem and seat on that side. Honestly though, while you are at it, replace both sides and you should have years of a drip free shower.
If the shower faucet has only one handle, you will need to replace the cartridge in the shower valve. Here is an article on replacing a shower cartridge.
If the water drips when the water is on, it may be a cheap shower head, or it may just need some plumbing tape around the threads where the shower head screws on to the shower arm.
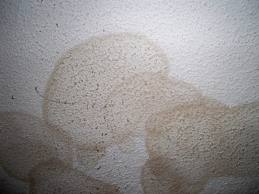 You see a stain on your downstairs ceiling, you know, right below your upstairs shower plumbing. That’s trouble. It could be the drain, the pressurized water supply plumbing, or a host of other items. Here is a step-by-step method to troubleshooting where the leak is coming from.
The first thing to do is to remove the shower head and cap the arm. Then turn on the shower valve. This will pressurize the incoming water supply piping and isolate this as a potential cause. It is a good idea to turn on the hot and cold handles separately to isolate each of those as well. If you have a single handle shower valve, you can turn it to full hot or full cold for this. Remove the escutcheon plate covering the shower valve and look inside for a leak. You will also want to go downstairs and listen for dripping during these steps.
If you can’t find a leak, remove the cap on the shower arm and attach a garden hose to it. You will have to screw on an adapter for the hose to thread on to it. Run the hose directly into the drain opening. This will isolate the drain as a potential cause. Run the water and listen for drips.
Still no leak? Plug up the shower drain and fill the pan with water. You can use a tennis ball or other object. Let this sit overnight to see if you get a drop in the water level and drips on the ceiling.
If everything has checked out so far, check for gaps in the caulking and the grout, if you have tile in the shower. You might be looking at a maintenance issue that has been overlooked. You can reinstall the shower head and start in one corner and start spraying the shower to look and listen for leaks.
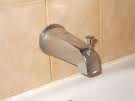 I got a call from a homeowner that he had a shower leak and that his shower wasn't working. The shower was working fine, but the shower diverter spout was letting all the water spill out at his feet. A very typical handyman job.
His shower is actually a tub/shower combination. So when he takes a bath he just turns the water on and fills the tub. When he wants to take a shower, he pulls up the little knob on the end of the tub spout diverter. This stops the water from flowing out of the tub spout and shoots it up a riser pipe to flow out of the showerhead. The problem was that the internal gate, which is attached to the knob, wasn't stopping much of the water, and so he got very little water out of the showerhead.
Although you can buy the parts to repair the tub spout diverter, you are better off just replacing the entire diverter. It costs about $15.00 and will save you some time. Rather than fiddle around with getting the gate out of the corroded diverter, bending it or breaking it anyway, just replace it. The spout will be attached to the end of the pipe by either a threaded fitting (just unscrew it), or it will be attached to a bare copper pipe with a setscrew.