 Painting is a job that is inexpensive on materials, but intensive on labor. In other words, you get to put in the elbow grease. It’s not difficult work, but you can’t be careless about it, either.
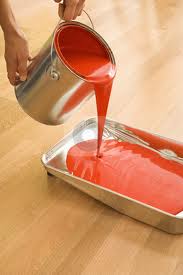
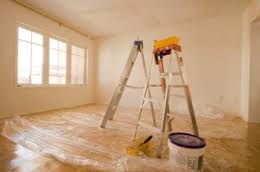
Depending on the quality of paint that you use, you can paint an average-sized bedroom for about $100. Plan on spending a day or so on the project. As is usually the case, painting the room is fast and easy; it’s the preparation that is the most important and time consuming.
If you can, remove everything from the room. If something is too large, put it in the middle of the room and cover it with a plastic tarp. Next, protect the carpet by running 3-inch masking tape along the baseboard. Push the tape under the base with either a wallpaper smoothing tool or a dull putty knife so as not to cut the tape.
Cover the carpet with either fabric or plastic drop cloths (fabric is better because it won’t move or become slippery). If you choose plastic, tape them down with the masking tape.
Remove all switch plate covers, air register grates and window coverings. Also, tape over outlets and switches as well as doorknobs, doorstops, hinges and strike plates. Remove light fixture covers, and cover the light bases with plastic bags and tape.
If you find old water stains on the ceiling, seal them with a stain sealer.
Sand the woodwork (if you have any) with a medium-grit sanding sponge. This will roughen the hard surface, as well as remove any high gloss finish.
Next, consider cleaning hand oil deposits from areas around light switches and door moldings with a de-glosser/cleaner. This will help the new paint properly adhere.
Prime the woodwork with a solvent-based primer. Use a small brush for the doorjambs, casings and baseboards, and a ½” nap roller for the door.
Fill in nail holes and gouges in walls and lightly sand the walls with medium grit sandpaper to knock off any bumps or imperfections from the previous paint job.
When you buy paint, stick with a higher grade from a recognized manufacturer. A gallon of quality paint will typically cover about 400 square feet. Estimate the amount of square feet you are covering (don’t forget the ceilings and closets) and divide by 400. Always round up so that you have extra paint, and realize that this number assumes only 1 coat of paint. If you are changing colors, particularly from a darker color to a lighter one, you will likely need multiple coats.
Next, roll on the ceiling paint. If you have popcorn ceiling texture, use a ¾” nap roller (if you have typical knock-down texture you can use a ½” nap). Roll on the first coat lightly in one direction, and then roll the second coat perpendicular to the first coat. You want to avoid having any popcorn texture fall from the ceiling and a light touch helps. Actually, popcorn texture should be sprayed with an airless sprayer to avoid texture on the floor.
Caulk all wall and woodwork joints with paintable caulking and smooth it out with a wet finger.
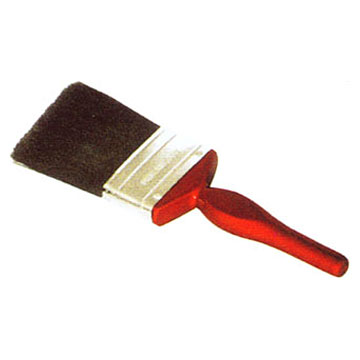
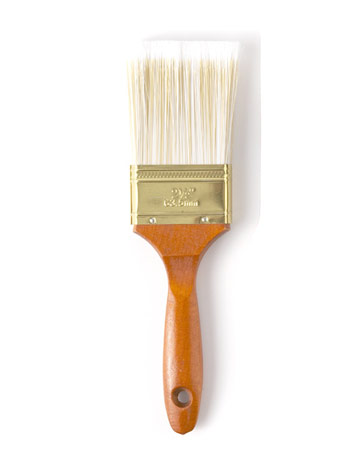
Cut in with a 3-inch brush and roll one wall at a time (“cutting in” refers to transitioning from one wall to another, particularly if the walls are different colors). This way, the wet cut-in will blend with the rolled area and will not leave a noticeable mark where the hand-painted area meets the rolled area. Use a ½” nap roller for the walls, first from top to bottom, then from side to side.
If you need to take a break, leave the roller in the tray and wrap the tray with plastic wrap. If you want to quit for the day, put the brush in a plastic bag and place it in the freezer-just thaw it out 30 minutes before use. I would replace the roller and the tray liner with new ones for the next day.
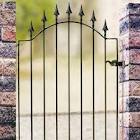 If you are looking for a quick spring home improvement project, how about painting the gate? It is reasonably fast, it won’t cost you much money, it looks nice, and it will get the HOA off of your back. All in all it’s a good project.
If you have peeling paint on the gate, scrape and wire brush it to get it off. After that you can apply a primer and let it dry. By the way, I wouldn’t paint an iron gate with anything other than a spray can or airless sprayer. Just painting a gate really isn’t worth getting out an airless because the set-up and clean-up is time consuming. So that leaves the spray can and they work very well. The only problem with the spray can is that your finger might get fatigued from holding down the button.
The big concern with spraying is over spray. You can avoid this by covering any nearby surfaces or using tape to define the border. The best tool though is a paint shield. Don’t bother buying one, just get a piece of cardboard and cut it to a workable size…18” x 36” seems to work well. Expect to get some paint on whichever hand is holding the shield.
To use the shield, just hold it wherever you don’t want the paint to go. If you have bars in the gate, hold the shield from the top and let it cover behind the bars. That way the bars get painted but nothing else does. Also, keep the can moving. If you stop the can, you are going to get a buildup of paint and it will run. Make several successive passes to get a good coat.
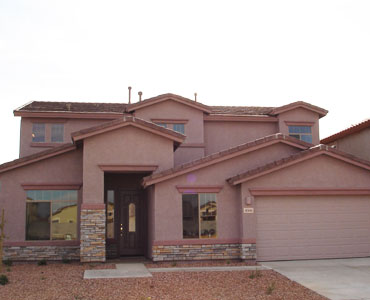 Painting is quick and inexpensive and there probably isn’t a bigger bang for the buck in fixing up your house. From a curb appeal perspective, you don’t even need to paint the entire exterior. By simply dressing up the house with some accents you can really set your house apart from the rest of the neighborhood (assuming your HOA allows it).
Paint the trim and eves. Scraping and painting is no fun but the finished product looks fresh and gives the impression that the house was well taken care of. But why stop there? Paint any stucco popouts a different color. Paint the front door and trim (or stucco popout) the same color. Let’s say that the house is tan. Paint the trim work either a lighter or darker color. Maybe it will look great if it is the same color as the trim at the eves and fascia. Also, paint any stucco popouts around the windows the same color so that the colors flow when someone looks at the house.
Painting stucco popouts is easy with a sprayer. Tape and cover the windows. Where the popout meets the stucco, you can use masking paper at that intersection to protect the wall. So the only thing uncovered will be the popout. Use some light passes with the sprayer and then remove the masking paper and tape.
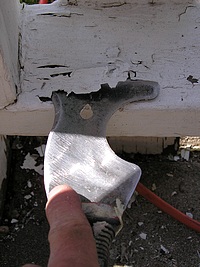 If you live in a homeowner’s association, there will be a time that you get a letter saying you need to scrape and paint your fascia boards and eves. This is the trim board area just under the roof line. It is usually painted an accent color. The only part you will need to repaint is the area which can be seen from the street, although it makes sense to paint the entire perimeter since you have the tools out.
The painting portion of the job is easy. Scraping the old flaky paint off of the board makes quite a mess below. I would recommend you cover the area just below the roofline with a drop cloth so that clean-up will be easy. If you have bushes below, cover them with a drop cloth too.
Set up your ladder and get a paint scraper. The stiffer the blade, the better. Start at one corner and move around the perimeter. Wear eye protection and a hat because the crusty paint chips will be flying around.
I like using a tampon roller because they are small and the painting goes quickly. Plus you can get the paint into tiny areas, so there is less touch-up with a brush. Although some people like to scrape a small area and then paint it while they are there, I prefer to paint the entire perimeter and then paint the entire area. It’s a personal choice.
You can have the best patch in the world but if the paint doesn’t match, it’s going to stand out like a three-legged racehorse. You’ve got a couple of problems with touching up the paint: one is the color and the other is the sheen.
Many people have the original paint that was used on the walls and they expect it to match perfectly. Unfortunately it does not. We run into this quite a bit: we can do a perfect drywall patch, but if the paint doesn’t match, the customer won’t be happy, even if they supplied the paint.
Maybe the number of years that the bucket sat in the garage changed its shade slightly, or maybe the sunlight shining on the wall bleached the old paint. Whatever the reason may be, you have a problem.
The simple solution is to paint the entire wall from corner to corner. Even if your paint is slightly off-color, when it is spread out over the entire wall, you won’t be able to tell. You will be left with two slightly different colors at the corner where the new paint meets the old, but the difference will be imperceptible.
The bigger problem comes when you just want to do a little touching up. This could be a drywall patch or even scuffs on the walls from the kids. Touching up a small area will be noticeable from some vantage point. When the paint dries, you may look at it straight on and it may blend in perfectly, but when you stand to the side you can tell, or it may look flawless in the morning but be noticeable in the afternoon. With touch-up painting, you have to be prepared for not-so-perfect results.
If you don’t have any original paint, you can cut out a sample from an inconspicuous area. You can try a closet, but if the wall being touched-up was beaten up by the sun, it may not match since the closet didn’t have the same exposure. You will need to take a sample to a paint center for a color match. The sample should be at least the size of a quarter, but I would cut one about 2 inches square. Use a utility knife and cut a square from the wall by pressing just hard enough to get through the paper face of the drywall. Pry up one of the corners and peel it off of the wall.
When you get a color match, you can apply a little drywall mud to the back of the sample, stick it back on, and then blend it back in.
Apply the paint sparingly. Use a paintbrush and dab the paint on instead of brushing it. You want to use the least amount of paint necessary to achieve the least noticeable touch-up. As you approach the edges of the area, almost wipe the brush dry and feather the paint out. Wipe the brush several times along the rim of the paint can and with small strokes in an outward direction only, feather the paint out.
You can also use a mini-roller to feather out the paint. Use the roller dry and roll it outward from the new paint to the old and it will help to blend it in. You will get good results from either method, but if you are picky, then paint the entire wall.
 Painting baseboards is no fun. You risk spilling paint on the flooring and if you have carpet there, the fibers can pop up and imbed themselves in the paint. You also have to be on the mark with a cut-in line if you have a different color of paint on the wall. So given all of the extra work and risk, wouldn’t you rather do something else than repaint the baseboards?
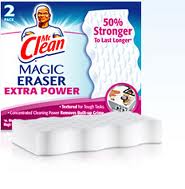
The cleaning aspect is easy if you have semi-gloss paint on the baseboards. You can even use a damp rag or sponge to wipe away the dirt. But I’ve found a product that has been around awhile that works great. Try using a “magic eraser” by Mr. Clean. You can get them at most grocery or department stores and they will save you a lot of time. Get the eraser damp and wring out as much water as you can. Then just wipe the surface you want clean.
You will need to put a little elbow grease in it, but it is pretty surprising how well they remove scuffs and dirt. I was really impressed with how well they remove scuffs that I thought had to be painted. There was just no way the scuffed up surface would look new again…but it did. You will find that the more you scrub a surface and the longer you use the eraser, it will begin to erode and shrink down to the point that you get a new one. This is a no-brainer alternative to painting…and it works on walls too. Just test an area first to make sure it doesn’t change the appearance.
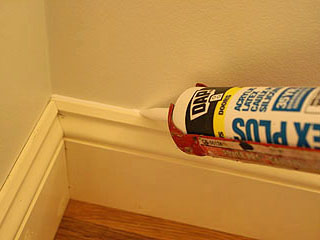 Painting is all about the details. Preparing the surface, caulking, and finally painting gives a needed change. When you are painting a wall one color, and baseboard a different color, caulking is crucial to getting a crisp line the separates the colors.
The mark of great forethought here is the area where the two different paint colors meet. It is here that people’s eyes are drawn to see the contrast. The line separating the two colors should be definite and straight with no overlap. Caulking is used to accomplish that.
The less caulking you use the better. At the top of the baseboard, lay down a thin bead of white paintable caulking. Do this before you begin painting either surface. Use a wet finger and lightly smooth out the caulking along where the top of the baseboard meets the wall. Use one continuous motion along the top without lifting your finger, or you will see this when the paint dries. Let the caulking dry.
I usually paint the baseboard first and let the paint overlap onto the bottom of the wall. You don’t need to be perfect here because the wall paint will cover it up. Once the baseboard paint dries, use blue painter’s tape and make sure the edge of the tape falls on the caulked surface. The tape will stand out horizontally which is why I like to paint the baseboard first.
You want to remove the tape before the paint on the wall dries, but after the paint sets up. In other words, if you pull the tape too soon, you may get wet paint that fouls your line. If you pull the tape too late, you may pull some of the dried paint off with it. Generally wait 15 minutes and test an area. If the tape comes up cleanly without pulling any paint off with it, keep removing it.
 Matching paint for drywall repairs is not easy. Even if you have the original paint, it probably won’t match the paint on the wall due to different factors. I can’t tell you the number of times I will ask a customer if they have the paint to match. They will say, “its just regular old white paint”. Sorry folks, there is no such thing as “regular old white paint”. There are, however, about 40 different shades of white paint to choose from. There is antique white, Navajo white, milk white, clean white, cottontail….you get the idea. Choose poorly and the wall repair will stand out. Choose wisely and your repair will disappear.
The computer matching services are pretty good so long as the machine has been calibrated. Cut a small sample from an inconspicuous area on the wall to bring in. Cut just through the painted surface so that the blade just cuts the top later of drywall paper. Peel this off and take it with you. Doing this will give you a good paint sample to match from, and you won’t have a hole to patch…only the surface and texture. Have the paint store blow the match dry right on your sample to see how far it is off. If you can see his spot on your sample you will see your drywall repair.
Once you can no longer see the paint on your sample, you have a good match. Retexture the small spot on your wall and paint the area. If you don’t have a good match, you will have to paint the entire wall to blend it in.
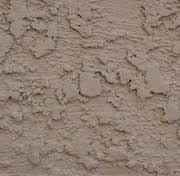 Painting stucco really isn’t much different from painting other surfaces, other than the texture of stucco is very different. Stucco can be applied so it has a sand finish, which is fairly smooth, or heavily textured, which would turn your hand to hamburger if you ran it across the surface.
When you finish a stucco patch, let it dry out. There are those people who swear by adding paint to the wet stucco mix, but I prefer to let the patch dry before painting. For heavily textured surfaces, you will need either an airless sprayer, or a thick nap roller. The airless sprayer is great, but you will usually end up painting the entire wall. You may paint the entire wall with a roller as well, but if you have a great paint match, you can get away with just touching up the patch.
Look for a thick stucco roller with will usually be ¾” thick. It will soak up a lot of paint, but it has to in order to paint the jagged surfaces of the stucco finish. Pour the paint in a tray and let the roller soak it up. You might gently press down on the roller like a sponge wicking up water. The paint will soak up into the roller.
Start out gently rolling the paint on the stucco. If you find that the paint is not getting down into the crevices of the stucco, press down on it and the paint should soak into the voids. Just don’t stop moving the roller. It’s best to roll and gently press down to control the amount of paint on the stucco.
 When you are painting, particularly when using an airless sprayer, preparation often takes more time than actually painting. When you are painting walls, you have outlet covers and switch covers to content with. When you are painting doors, you have door knobs, strike plates, and hinges. Should you cover them with tape and paper or just remove them from the door?
The answer lies with your ability. I personally remove the hardware. With a drill driver, I can remove the screws and set everything in a neat pile, cover it with a drop cloth and keep it from the spray. Many people, however, would say I am wasting my time. They cover everything up with tape and paper. I don’t agree with them however, because I have tried their methods and end up missing a small area, or paint runs under the tape’s edge, etc. I usually spend far more time, in my opinion, cleaning up the paint off of door handles, etc. I also spend too much time focusing on taping everything just perfectly so that I won’t end up cleaning paint from these items.
So in my opinion, I can remove hardware and reinstall hardware in less time that it takes me to cover everything up and then clean any paint errors off of the hardware. You might be much more skilled at that than I am however.