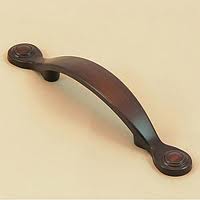
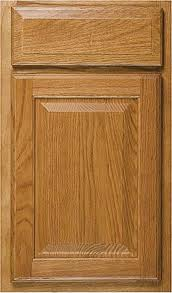
 Dressing up your cabinets with new knob or drawer pulls is a great idea. You can totally change the look of your cabinets with just a few hours and a low cost.
Cabinet knobs come with screws that enter through the back of the drawer face and screw into the cabinet knob or pull. If the screw is too long, there will be a gap between the screw head and the back of the drawer or door face. This will allow the knob to pull out by that amount of distance before the screw head engages the drawer or door and pulls it open.
Two obvious choices here: either cut off the screw or fill in the gap with a washer or two.
The danger with cutting off the screw is that it will be very difficult to get it to thread into the knob. I have used the washer trick many times and it is fast and easy. You don’t need to get the distance perfect, just so that the screw enters the knob and the whole assembly gets tight so that it won’t come apart. You are probably looking at between 1 and 3 washers per knob to do the job. Add some washers to the screw and insert the screw into the rear of the drawer face, then screw on the knob. If it is still loose, just add another washer.
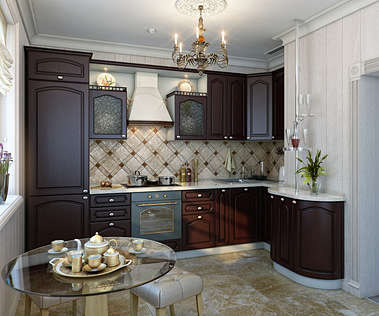
.JPG) If you are creating a casual area with base cabinets and a countertop, you will need to plan how to finish the exposed edge of the counter. This can be done in several ways and each is pretty easy.
If you are creating a casual area with base cabinets and a countertop, you will need to plan how to finish the exposed edge of the counter. This can be done in several ways and each is pretty easy.
The most basic is to use iron-on edging. This is a thin veneer with adhesive on the back of it. You hold it up to the exposed edge and run a hot iron on it to activate the adhesive. You can trim it and stain it to match the surrounding surface.
You can also install a piece of molding on the edge. In many cases the supplier has a selection of moldings that are pre-finished to match the surrounding cabinets and top. This is the easiest method to use if you are looking for a dead-on match of the cabinetry.
The only question is whether to nail it or glue it in place. If you nail it, you will need to fill the holes which never appear as well as an unbroken finish. The other option is to use adhesive to join the strip to the edge of the countertop. This is a great way to maintain the appearance of the strip of molding. You have to use plenty of strips of painter’s tape to hold it in place until it dries. This can be tricky…once the surfaces are wet they will slide all over the place. So, have the strips of tape ready and tape it in place. Then you can add more strips to fine tune the placement of the strip and make sure it is exactly where you want it.
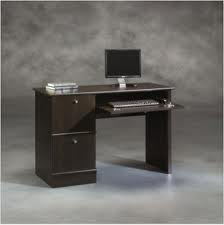 Sliding keyboard desk drawers or even sliding cabinet drawers can get overloaded pretty easily. Just think if you are typing on a slide out drawer, the weight of keyboard and your arms are resting on the drawer. People will put a lot of weight on the drawers and expect nothing to happen until it comes apart.
Something on the drawer will give. It will either be the sliding mechanism, or where it attaches to the cabinet or where it attaches to the slide out drawer. You have to figure out where it is damaged and fix it.
In some cases the sliding mechanism we become bent. If that is the case, I would just replace the slider. They are sold in a pair, so if you don’t get an exact copy of what is currently installed, you should replace both sides.
If the wood cabinet is damaged, the holes holding the screws will be cracked or oblong. You can fill these holes in with some wood glue and then stick a wooden golf tee in the hole until it dries. Cut the tee off flush with the surface and predrill a new hole in it.
If the shelf has split, remove it from the sliding mechanism, glue it and clamp it back together for a day or so. Then reinstall it back onto the slider.
 The other day I heard someone say they were going to install ceramic tile on the floor and then install cabinets on top of it. I guess that is okay, but why? The guy said that if he ever wanted to replace the cabinets, he wouldn’t have to worry about the flooring lining up with the new cabinets.
Okay, I guess I understand that, but how often are you planning on replacing the cabinets? I’m guessing that by that time, the flooring will be out of date and you will be doing the entire project all over again…and that is just more tile to break up and haul away.
As for now, why not install the cabinets first, and then lay the tile up to the cabinets? This way, you not only save the extra cost of buying and installing the additional tile, but there will be less fuss installing over possibly wavy tile, although that is what shims are for. The savings could really add up. Take a cabinet depth of 2’ and multiply that by the linear footage of the cabinets to get a square footage. Plus, if you do decide to replace the cabinets in the future, the depth of the cabinets won’t change so you shouldn’t have to do anything to the tile, unless you change the configuration of the cabinetry.
 I had a customer that was installing some cabinets and trying to screw the two frames
together. He didn’t have much luck, as the first time he attempted this he
twisted the screw head right off of the screw. Luckily he was able to
wrench it out. The next time, he almost got the screw all the way in, but
heard a loud crack. He reversed the screw and noticed that the wood had
cracked.
It sounded like he may have not pre-drilled the holes, and that possibly he was not using the right screws.
When you screw together two pieces of hardwood, you need to predrill the
hole. This allows the shaft of the screw to enter the hole without
splitting the surrounding wood, and allows the threads to cut into the
sides of the hole. Soft wood will compress but hardwood won’t; it splits.
The diameter of the hole you drill depends on the size of the screw. I
usually hold up the screw and look at the shaft (the diameter excluding
the threads). I will then find a drill bit that is the same diameter or
slightly less before I drill the hole.
Before you predrill, clamp the pieces together and make sure the bit is
sharp. The spiraling action of the drill bit should remove the wood
shavings as the bit cuts, but you should pull the bit out of the hole
regularly to clear it. You will find that with hardwood especially, the
shavings will compact and friction will cause it to smoke.
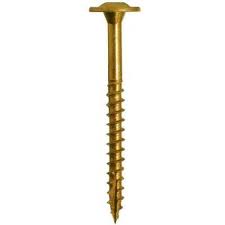
The other possible problem is your choice of screws. For cabinets, you
should be using wood cabinet screws. The manufacturer may have supplied
you with the proper screws or at least listed the proper kind. Bore the
screw into the predrilled hole until snug.
 A cabinet drawer suffers lots of abuse. People slam drawers and little kids pull up on them. Occasionally, a drawer front will come off. Fixing it is easy.
Drawer fronts are attached from the inside of the drawer. Some are screwed in, some are stapled, and some are glued. For the repair, I would plan on screwing from inside of the drawer box and into the drawer front.
The big challenge is getting the front back on the drawer so that it aligns with the neighboring drawers. This isn’t difficult, and you should be able to use the marks on the back of the drawer front as a guide. Place the drawer front face down on a padded surface and set the drawer on top of it. You should be able to tell exactly where the drawer was attached to the front due to screw or staple holes, or even wear marks. Use some padded C-clamps to hold the front to the drawer. At this point you can place the drawer back into the opening but it won’t close due to the C-clamps. Make sure everything is lined up and then you can pre-drill some holes from inside the drawer to the front. Make very sure you don’t penetrate the drawer front with the drill bit.
Once you have the holes drilled, screw the drawer box to the front and reinstall it onto the guides.
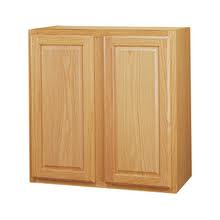
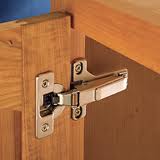 Having one cabinet door higher or lower than the others looks very strange. It is either that the hinges need to be adjusted, or maybe that the doors weren’t installed correctly in the first place.
If you are lucky, you will have the adjustable European hinges. These hinges are not seen until you open the door, and they can be adjusted for and up and down, side-to-side, or front-to-back movement. It is easy and fast, and all you will need is a screwdriver.
European hinges will have two screws on each hinge that you will need to slightly loosen to adjust the door for height. These screws on the cabinet wall and are at the front of the hinge closest to the opening, at the top and bottom of each hinge.
Loosen the screws at the bottom hinge first and support the door as you slightly loosen the top hinges screws. You will feel the weight of the door in your hand when you have loosened the screws enough. Move the door up or down to your liking and tighten the screws to hold the door in place. Close the door to check its alignment with the other doors. If you are satisfied, open the door back up and tighten the screws until snug.
 Cabinets these days are built fast and cheap. If you are lucky, solid wood will be used for the door frames, but he cabinet body will be a particle board material or other relatively inexpensive material. The backs of the cabinet will be ultra-thin, so thin that if you tried to install a screw through it, it would probably tear and the cabinet would fall. For this reason, cabinet manufacturers put a thicker piece of wood at the top and bottom rear of the cabinet. This is so you can screw them to the wall and they will stay.
Use cabinet screws to hold them in place. These have a larger head for more bearing pressure. If you are installing a row of wall cabinets, it's easy to get them aligned if you first screw a 2"x4" to the wall where the bottom of the cabinets will sit. This way, you can sit the cabinet on the board and screw it to the wall. They will all be neatly aligned. Once the cabinets are on the wall, you can install a screw through the frames to hold them all as one unit. You will need to pre-drill the holes and then screw the frames together.
 There are times when you open a cabinet door and maybe it makes a cracking noise, or it may not want to stay closed and instead pops back open.
Start with the hinges. Inspect them and check that they are not damaged or loose. On base cabinets, kids will open the doors and sit on them which can either damage the hinge or surrounding wood. If this is the cause, you may have to replace the hinge or repair the damaged wood. Also check to make sure the hinges are not loose. If they are, obviously try to tighten the screws that hold them, or you may have to remove the screws, add some toothpicks and glue or a golf tee and glue. If you use a golf tee, drill a small pilot hole for the hinge screw to screw into.
If the cabinet door won't stay closed, you can use a magnetic catch to hold it closed. You won't be able to see it when the door is closed. You can screw the magnet side of the catch to the frame of the cabinet and the metal plate to the door frame. When the two halves come together, they stick until someone pulls the door away from the frame.
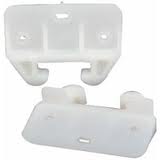 Some cabinet drawers have drawer guides on either side of them. They have one-half of the guide mounted to the drawer and the other half mounted to the inside of the cabinet opening.
Other drawers have a plastic guide that is stapled to the top rear of the drawer. These can break off or become damaged (they are plastic after all) and need replaced. The fortunate thing though is it that it is easy.
These style of drawers ride on either wood runners or the runners may be covered with plastic for easier gliding. The rear of the drawer rides on a guide down the center of the opening. Remove the plastic guide and take it with you. They are usually color coded and so you can just buy the right color which should be the right size. Match them up just to make sure.
When you get home you can reattach the new plastic guide. If you don’t have a heavy duty stapler, you can use some screws to hold the guide on. Use at least two screws in opposing corners so that the guide won’t move. Once it is attached, place the plastic clip onto the guide and slide the drawer into position.