 It may take someone that is handyman minded to tackle removing rusty, corroded washing machine hoses. Maybe you are moving or just upgrading the hoses or appliance, but those old fittings must come off.
I would start off by using opposing force. What I mean is using two large wrenches and using them in a manner that allows you to free the corroded fitting without damaging the hose bib or your knuckles. Let me explain.
Let’s say you will be using two large pipe wrenches. You want to configure the two wrenches to that when it comes time to apply force, the two wrenches will be opposing each other. Take one wrench and open the jaws. Place it under the hose faucet’s spout, and hold the faucet’s body and spout so that it won’t move when you turn the corroded hose coupling. Take the other wrench and place it over the hose’s coupling facing downward. What you have now are the two wrenches facing each other so that the handles are just a few inches apart. The idea is to be able to cradle the bottom handle in your fingers while squeezing the top handle with your hands. You only need to move the top handle roughly a quarter-turn to free it…and if the wrench slips, your knuckles don’t suffer.
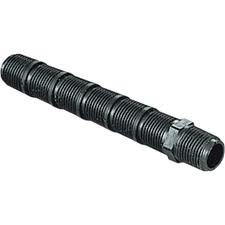 Sometimes sprinkler heads need a little handyman help. If it was installed too low and sod was laid around it, it may not be clearing the grass to spray the surrounding area. In this case what you will see is a lush ring of green grass around the sprinkler, but dry grass a little farther out. You can raise the height of the sprinkler head to clear the grass.
The sprinkler head just unscrews from the riser, and the riser screws into a threaded elbow or tee, depending in where in the pipe it lies. There is no glue or tape needed for these connections.
To raise the sprinkler head, unscrew it and the riser from the threaded fitting. You will be adding a longer riser. You can buy risers in a variety of lengths, or you can buy a riser that allows you to cut it to the length that you need. These are nice in that you can cut it, and if it is still too high you can cut it again. Remember that most sprinkler heads pop-up once the water pressure hits the sprinkler, and so you will gain a little height from that. Make sure you don’t raise the sprinkler head up so high that the lawnmower hits it and shears it off.
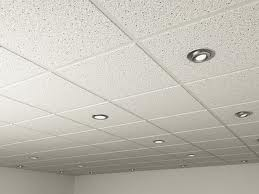 A handyman can replace ceiling tiles quite easily. The only challenging issue is finding a perfect match.
Ceiling tiles get stained from plumbing or roof leaks, and when they do it looks like a brown splotch on the tile. It’s not a very professional look for an office.
You may find a very limited supply at a home center, so plan on going to a specialty retailer. Look up “acoustical ceiling tiles” for some choices and you would be wise to bring in a sample tile.
The edges of the ceiling tile sit on a suspended track system. They weight of the tile keeps it in place. You can remove the old tile simply by pushing up on one side and lifting it up and out. You will have to angle it to get it out. The new tile just lifts into the opening and you can set it into the track.
There are some tricky parts when you have to cut a tile. You will have to cut them as you approach the end of the ceiling. You can score them and snap along the score line. Place the tile on a flat surface so that the score line is along the edge of the table and then gently push to snap. You can also just cut the tile completely through. This takes more time, but will leave you with a cleaner finish cut.
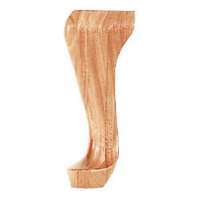 A handyman can usually fix a dent in a piece of wood furniture. A dent is caused by an impact that compresses the fibers of the wood. It can be reversed back to normal with the help of a little steam.
Just place a few layers of damp fabric over the dent and then touch the fabric (not the surrounding wood) quickly until you get the desired result. Be aware that this process can go wrong pretty fast, so you need only touch the fabric and lift it off quickly and gradually extend the contact time until the dented area is level with the surrounding surface. Then let the area dry.
This process works well on solid wood furniture, particularly unfinished furniture. If the piece uses veneer (a thin layer of wood that is glued to a cheaper surface), don’t apply the iron to it as it will soften the glue that holds it down.
Once the area is dry, lightly sand the area or it may absorb more stain and turn a slightly darker color than the surrounding area.
If the impact was strong enough to cut the wood fibers, the steam trick won’t work. In that case, you will need to fill the area with wood putty to make it level, and then stain it to match the surrounding area. If the finish is not cracked or broken, and only the wood is compressed, you can try alternating hot and cold at the area.
Typically, you’ll need somewhere between 100-120 degrees for the heat and some ice for the cold.
Lay dry fabric on the damaged area and apply the heat for 10-15 minutes and remove it. Then place some crushed ice in a baggie and set it on the wood for the same time. You can repeat this process several times and the compression will usually rise back up.
If this process fails, you may be faced with either scraping the finish off and using the steam trick, but then you will have to refinish the area.
You just might reconsider the whole deal if repairing the piece of furniture is beyond your comfort level. Just tell your guests that the dings and scratches give it character.
 Handyman Trims Wallpaper
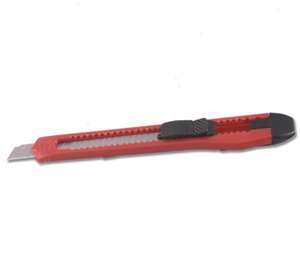
You don’t need to be a handyman to trim wallpaper. You just need a super-sharp razor, a straightedge, and a steady hand. Trimming the paper gives the wall a finished look.
Installing wallpaper is not a pleasant task, but many people like the finished look. After you measure the length of the drop, you will activate the paste (usually get the back of the paper wet), let it book (let the paper sit after folding the adhesive sides together), and then hang it on the wall. Push out the large air bubbles and get the first drop to sit right on your plumb line. Move to the next drop and hang it in the same manner, then go back and trim the first drop.
Use a new blade to cut the paper. A break-away blade is great because you don’t have to continually change blades, you simply snap off the old one and you have a fresh sharp edge to use. Most of your cuts will be at either the ceiling or the baseboard. Use a straightedge or taping knife and hold it where the surfaces meet. For example, push the knife on the wall to where it meets the baseboard and run the razor along the edge. You always want the knife to protect the wall while you cut. Don’t place the taping knife on top of the baseboard and cut as you will cut the paper too short. Plus if you use a dull razor, you could end up tearing the drop and have to start over.
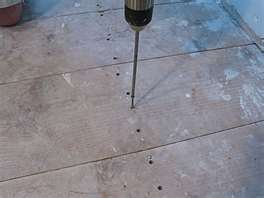 A fairly common handyman job is to repair squeaky floors. This happens when the floor is on joists, and a prime location is at the stair landing. It is the perfect area for kids to jump over the last few steps and land with their full weight on the landing.
The squeak noise comes from movement. So to stop the noise, you have to stop the movement. A stair landing is fairly small, but regardless of where the squeak is, the process is the same. You will need to roll the carpet and pad back once you find the source of the noise. If you were to remove the carpet and pad, you would see a line of nails as they were shot into the joists. Some hit the joist and some do not…carpenters move fast and “bump fire” the nail gun which isn’t always very accurate.
Stand on the floor and move your weight up and down. You will hear and feel the floor moving slightly. Keep moving until you can isolate the noise. Drive a deck screw through the sub floor and into the joist. The threads will pull the floor down on top of the joist and hold it. Move your weight up and down again to verify that the noise is gone. It probably makes sense to walk the entire floor to check for any other noise since you have the carpet pulled back. Once you are done, if you don’t feel comfortable placing the carpet back on the tack strip, you can hire a carpet company to finish up.
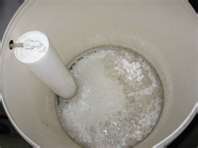 Water softeners occasionally need a handyman. If you find yourself without soft water it may be due to a salt bridge.
A salt bridge is a crusty buildup of salt inside the tank. If you were to take a cross-section of the brine tank, it would look like a bridge…hollow underneath and dense salt which forms the “bridge”. High humidity can cause a salt bridge. Salt crystals bond to each other and form a crust. As salt below the crust is used in the regeneration process, the bridge never moves and consequently the water does not get softened. If you look into the tank, the salt appears to look normal, but the salt does not appear to be decreasing over time. You need to break up the salt bridge and dispose of it.
You can use a broom handle or really any tool with a handle. Turn the broom or tool over and try to break through the bridge in the center. Stay away from the walls of the tank and make sure you don’t puncture the bottom of the tank.
Once you break the bridge up into pieces, remove the pieces from the tank. You can go crazy if you like and use a wet/dry vacuum and clean out the tank. Refill the tank with new salt pellets and set the controller to regenerate. Depending on your home’s use of water, you should have soft water again in 1-2 days.
 I have a customer who has a large broken vertical window blind, so she called her handyman. The only problem is that the vanes no longer twist to the open and closed positions. On this particular blind, there were two cords on one side. The short cord is used to rotate the vanes, and the longer cord to retract all of the vanes to one side. The short cord would move, but something in the head rail was broken and the vanes didn’t move.
This head rail was ten feet long and would have to be a special order item. The clips that hold the vanes in place are all universal. But the way the head rail mounts to the wall may vary. If you are lucky, the head rail will attach in the existing supports.
Remove the vanes by spreading the clips enough to lift the vane up and out of the clip and set the vanes aside. When they are all removed, it is time to remove the head rail. There is a spring-type clip that holds the rail in place. Push on the back of the spring clip and slightly rotate the rail forward to free it from the clip. I remove the outermost clips first so that the only one left is in the center. This way it is easy to balance the rail while you remove it.
At this point you may have to replace the wall supports, or you may just be able to rotate the new head rail into the old clips. Once you have the rail up, you can adjust it for the distance from the wall and then re-hang the vanes.
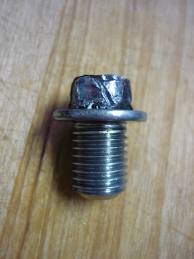 Many handyman tips I have learned out of necessity. You get stuck and you have to figure a way out. A rounded bolt head is no exception. Someone else may have chewed up the flat sides and now it is a big round mess. The first thing I did was grab the biggest water pump pliers I had and squeezed and turned. Leverage is a wonderful thing…sometimes it works and sometimes it will twist the head of the bolt right off.
Assuming the bolt head is still attached, you can make opposing flat sides that will allow you to place a wrench on it. Use a grinder or a file and grind away enough material to make 2 flat opposing sides. Then place a wrench on it and turn out the bolt.
While you have the grinder out, you can try cutting a slot down the middle of the bolt’s head. When you have the slot cut, you can insert a screwdriver into the slot and remove the bolt. Although conceptually this works, you will probably find that you can’t get enough torque from the screwdriver to remove the bolt. So try using a screwdriver with a square shaft and while putting your weight down upon the bolt head, place a wrench on the square shaft of the screwdriver to turn it. In this way, you have a lot of force on the bolt while attempting to unscrew it.
 A customer called his handyman and told him he had an iron gate that has been pulled out of the block wall and a chunk of the block came out with it.
Most gate damage occurs at the latch side. Since many have self-closing hinges, people walking through them swing them open and let them slam closed. Over time, this loosens the latch and it will need to be repaired. Many landscapers and pool service companies have allowed me to stay employed performing just this service. God bless ‘em.
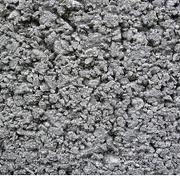
There are several products that will anchor objects into concrete. Quikrete makes an anchoring cement that will reach a pull-out strength of over 12,000 psi after only 24 hours. You can vary the consistency of the mixture by adding or reducing the amount of water in the mix. Since you will be working on a vertical surface, you will want the mixture to be more stiff and putty-like so it doesn’t just run out of the hole.
If the void in the block is small enough, you might try the gambit of anchors to see if you can avoid refilling the void. You might be able to drill a larger hole in the block and use a large anchor.
If you need to fill the void, mark the location where the anchor goes. You can use two pieces of tape and place one vertically above the hole, and the other piece horizontally to the side of the hole. You can follow the lines from the tape to align your anchor.
You may have to enlarge the hole for the cement to properly hold. The depth of the hole should be at least 2 inches, and the diameter of the hole should be at least three times the diameter of the anchor (a minimum of an inch). You can use a cold chisel and a hammer for this-just make sure you wear safety glasses.
When the hole is the right size, vacuum out the hole to remove any debris and loose dirt. Use a spray bottle and lightly mist the hole where the mix will go.
Add the water to the dry mix and stir it up until it is thick and blended. Stuff the mixture into the hole with a trowel. The block you are working on may be hollow or it may have been filled when the wall was built. If the block is hollow, you will have to stuff in a little more of the mixture.
Place the anchor into the mixture and pack everything tight until the mix is flush with the surface of the block. You will want to hold the anchor in place until the mix begins to harden. The time this takes will depend on the amount of water you used to mix the batch-more water means it will take a little longer.