 You won't need a handyman to fix your wobbly or loose dishwasher. It sometimes happens that maybe one of the legs of the dishwasher is sitting on debris, or maybe someone installed ceramic tile that is uneven. The dishwasher legs are made to be adjusted up or down to accommodate any unevenness. So if your dishwasher wobbles, it will take about 5 minutes to fix it.
You will need to get access to the feet of the unit. Remove the bottom panel by unscrewing the screws that hold it in place. If you only need to get access to the front feet, than all the better. Otherwise, you will have to remove the screws at the top of the dishwasher that hold it to the underside of the counter, and pull the unit out of its opening. You can get access to the rear feet this way (or you may be able to shimmy your arm back there). Rock the DW to determine which feet need to be adjusted. Usually it is just one, but sometimes two. To lower the foot, rotate it counter-clockwise. This will stop the rocking motion. You may want to level the dishwasher and raise a foot by turning the foot clockwise.
Once it is level and balanced, center it in it's opening and resecure the screws that hold it to the underside of the counter and then reinstall the bottom panel.
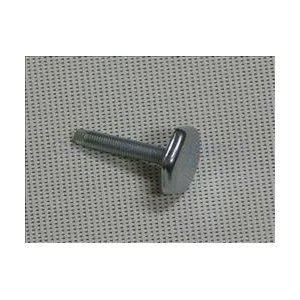
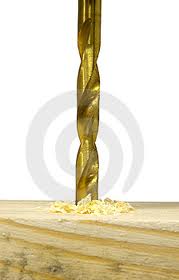 Here is a handyman tip that may help prevent you from pulling out your hair. If you are working with certain species of wood, namely hardwoods, you will find that they can be difficult. Hardwoods will dull blades and bits very fast. They are also unforgiving when you try to install a screw or bolt through them. I’ve done a lot of work with solid oak, and I learned the hard way (and expensive way), that if you don’t pre-drill the hole for the screw, you are going to split the wood.
So hint number 1: pre-drill the hole. You can hold a drill bit up to the screw you are going to install, and select a size that is just barely smaller than the shank of the screw. Drill the hole into the wood. If the hole is going to be deep, you may need to manually clear the bit and the hole of wood shavings or it may start to smoke.
Hint number 2 is to grab a bar of soap. Rub the screw’s threads on the soap until you have some soap shavings along the threads. The soap will act as a lubricant and the screw will go into the hole like butter.
 Whether or not you should have a handyman assemble furniture is a case where you must put a price tag on your time. If you flip burgers for a living, maybe you assemble the desk. If you are a corporate executive, maybe you consider paying someone to do it. If you enjoy working with your hands however, this desk project will be worthwhile no matter what your profession.
A large desk with a hutch can weigh several hundred pounds, as I’m sure you found out when you brought it home. It is likely made of particle board or medium density fiberboard. If you are lucky, you will only spend several hours on the assembly. Still, it may take a chunk of your day.
Fortunately, the instruction manuals are clear and understandable. You will only need simple tools, such as screwdrivers and a hammer.
The large pieces of the assembly (the top and sides) are connected with cam mechanisms on one piece and then mate with a rod on the matching piece. Roughly half of the time it takes to assemble the furniture will be spent placing the cam mechanisms and rods in all of the pieces, as well as the hardware in various pieces.
When it’s time to connect the larger ones, you turn the cam with a screwdriver. This turning action grips the mating rod and pulls the two together for a snug fit.
Since many parts look identical, make sure you orient each piece so that the finished edge is where it should be. Manufacturers only finish the visible edges, so when you are installing the hardware and assembling the pieces, make sure finished edges are where they are supposed to be. It’s a bad day when you finally stand the furniture up and you have raw particle board edges staring at you.
One of the most tedious tasks will be assembling the drawers. There are lots of small pieces that fit together just right. Each side is secured to the drawer front by brackets or grooves while the drawer’s bottom is slid into slots in the sides. The back of the drawer slides down onto the bottom.
Once all of the hardware is installed, you can start assembly. For the larger pieces, this will take place on your floor.
Do not stand the structure upright until you nail the back on it. The back holds all the pieces squarely so they won’t collapse. Nail it on and then you can stand the piece up.
All that’s left is to slide the drawers in and place the plastic covers over the cam mechanisms to make them blend in a little.
 Here is a simple handyman tip when you have broken a light bulb and need to remove the base of the bulb which is still in the fixture’s socket.
Make sure the power is off before you start anything. Ideally, if there is any space between the base of the bulb and the fixture’s socket, you could get needle-nose pliers in there to physically grab the base of the bulb. Now just by grabbing it, you may not be able to unscrew it. So if you can use another set of pliers to grab the other side of the base you are in business. You want the pliers to be on opposite sides of the bulb’s base and then move them counter-clockwise in unison.
You can also try using a single pair of pliers or wire cutters (even scissors might work) to create enough friction on the inside of the base to unscrew it. Close the pliers, place them inside the base of the bulb and then open them until they contact the interior of the base. You will want to keep pressure on them which in turn places pressure on the base. Now turn the pliers counter-clockwise. With any luck you will be able to get the base turning, and finally be able to unscrew it from the socket.
 Here’s a handyman tip for patching carpet. If you are lucky enough to have a scrap or a remnant of carpet laying around that matches the area you need to patch, count your blessings.
Regardless of whether you do or don’t have a remnant, you will need to cut out the damaged area of carpet. This can be tricky because you want to make the cut in the shape of a square, but not cut any fibers of the carpet. You want to cut the backing while leaving the fibers intact. That is easier said than done.
You can use a carpenter’s square and push it down onto the carpet. Spread the fibers of the carpet like you are parting your hair. You should be able to make a straight line that runs the length of the square. Cut along the square with a sharp utility knife. Ideally you want to cut only the backing and not the fibers, but in all likelihood you will cut some fibers. Continue cutting in this manner until you have a square patch removed.
You can cut the new patch in the same manner from your remnant using the old patch you removed as a template. If you don’t have a remnant, go into an inconspicuous spot, like in the corner of a closet and repeat the process for cutting out a new patch.
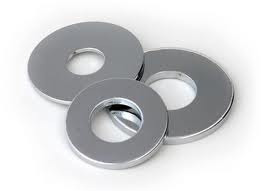 A handyman uses washers for a variety of jobs. Washers are typically used with screws and apply force to a wider area than would the screw head alone.
If you are installing boards to a wall, you might use lag bolts, for example. Lag bolts have large threads on a large shank that have lots of holding power. If you were to continue to screw in a lag bolt, you could probably break the surface of the board until the bolt head was virtually flush with the surface of the board. The large threads have a lot of pulling force. By installing a thick washer under the head of the lag bolt, that force is spread out under the diameter of the washer. So the force is distributed to a larger surface area.
Lag bolts aren’t the only application for washers, rather they are used in many different situations. They are used for wood, metal, plastic, etc.
Washers are made of different materials also, including metal, rubber, and plastic and can be used for a variety of purposes. Some have teeth that bite into the surface being driven into, some are lock washers and help the bolt and material to stay together and not allow the bolt or nut to work loose. They can also be used as spacers.
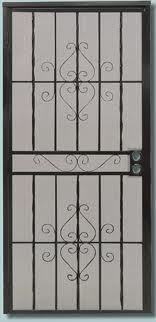 Having a security door installed by your handyman is a common job. However, if you want to tackle the job yourself, it shouldn’t take you over an hour.
Once you get the door home, it is all about placement. Determine which side the door will swing from (the hinge side should be on the same side as your home’s door) so that you don’t have to go from one side of the door to the other. You will want to check that the door knobs don’t hit each other as they protrude from the door…this will prevent the security door from locking. You can switch the position of the handle and lock to alleviate this.
Set the security door on a piece of wood or other object until the height is correct and then make some marks on the wall where the holes are located. Remove the door and pre-drill the holes for the jamb. The diameter is usually 3/16” but check to make sure another size isn’t specified.
With the holes drilled, use a bar of soap and rub it on the threads of the screws (this will act like a lubricant). Set the door back at the correct height and start screwing in the screws. Monitor your progress with a level. Once the hinge jamb is secured, install the door knob and lockset. Move to the latch side of the frame and extend the deadbolt, lining it up with the door. Install it by following the same procedure as above. Then install the head rail in the same manner.
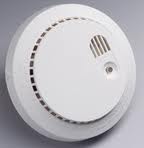 It’s my handyman obligation to remind you that you should have replaced the batteries in your smoke detectors last week when we changed the clocks for daylight savings time. It is also a good time for you to determine if the smoke detectors need to be replaced. If your detectors are 10 years old, you should replace them.
Replacing a smoke detector is easy. If you buy the same brand of detector that is currently installed at your house, to may not need to replace the pigtail that connects the house wiring to the detector. However, over time, manufacturers do change sizes, etc.
If you need to replace the pigtail, shut off the power to the circuit at the main panel. The pigtail will be wired to the house wiring with wire nuts. Replace the wires of the old pigtail with the wires of the new one, color for color. Snugly twist on a wire nut to hold the wires securely.
You will probably need to replace the ceiling mounting plate that holds the detector to the ceiling, but this in a matter of two screws.
Plug the new pigtail into the new detector and then rotate the detector to engage the tabs on the mounting plate.
 Yes, even the garage of a handyman needs to be organized. Finding things in a messy garage or work area is very frustrating. Soon enough the pile of stuff needs to be placed in a way that allows you to be able to find and use it like you want.
The biggest thing is to get things off of the floor. It will open up areas that you will be able to use, plus you will feel less stress when you go into the abyss.
You can buy organizing items at any home center and they are easy to install. Yard tool organizers mount to the wall and allow you to hang all of your yard tools along the wall. It’s the same deal with your hand tools. Buy pegboard and hooks and soon enough the hammer and screwdrivers will be staring you in the face.
For items you don’t use very often, buy plastic stackable bins and throw them in the bins and then stack them out of the way or hang them from the ceiling. The more expensive option is to install large garage cabinets, but the bins are a good second choice. While you are getting things off of the floor, hang up the bicycles and ladders too. There are special hangars for those and they install in 5 minutes.
My favorites though are the ceiling racks. These hang from the ceiling and effectively give you a second level of storage. You can place bins on the racks up to several hundred pounds.
 Even a handyman doesn’t like roof work. However, it is a simple edge tile replacement, then the most difficult part is finding a good match.
Roofing work is dangerous; just ask any workers compensation company. If you don’t have to be on the roof, then stay off of it. If you feel comfortable at heights, and have a safe ladder to reach the edge, then maybe you can consider it.
There are times when an edge tile will crack or break (or even fall off if it wasn’t installed correctly. High winds will cause trees to topple and knock off tiles. Wind can cause tree branches to drag along the roof edge and displace or knock them off. (Note to homeowners: trim the trees).
So where can you find a match for a missing or broken tile? Go to a roofing wholesaler and meander through their boneyard. A boneyard is where they place unused tiles from previous jobs, and it can be a godsend. It’s best to take a sample tile with you to get a close match. They will probably charge you a few dollars if they don’t just give it to you for free.
When you get back home you will need to place the tile back into position. It has a lug on one side and it will fit under the tile above it and rest on the tile under it. Then hit a nail through the hole in the tile to keep it in place.