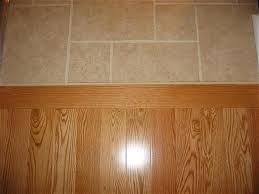
 When two different flooring surfaces meet, such as ceramic tile and laminate, there must be a transition between the two. A transition strip allows you to mate the two surfaces with an attractive strip to bridge the gap between the different surfaces. When laminate flooring is involved, you will use a transition strip made of laminate.
This transition strip is shaped like the letter "T" with the top spanning both the ceramic tile and laminate surfaces. The vertical leg of the "T" gets secured into a gap between the two surfaces. The size of this gap depends on the type of transition strip you are using. Many of these strips have a metal channel you will install first into the gap. You can nail or screw the metal channel down (and in some cases use a construction adhesive like Liquid Nails). Once the channel is in place, the transition strip gets pushed into the channel. Trim it to fit first and then snap it in place. The metal channel will hold the transition strip, which covers the ends of the different flooring surfaces.
Once the transition strip is installed, it should be flush with both surfaces. In other words, you want to make sure you install each surface so that they are equal in height. Otherwise, you may find that the transition strip will be higher on one side than the other, and may not even stay in the metal channel.
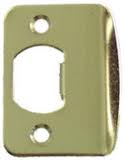 A door strike plate is the curved piece of metal that the door button contacts and latches into. If you have a door strike plate that is loose or too tight, you can repair it so that it does its job.
If the door latch is loose, use a screwdriver and tighten it. If the screws don't tighten it, use longer screws so that they contact new wood or even contact the framing behind the jamb.
If the door strike is too tight, it is likely that it was placed on the outside of the jamb without mortising it to be flush with the jamb. You can trace around the strike plate with a pencil and then remove the plate. Use a hammer and chisel and remove some wood inside the trace line. You want to remove only enough wood so that the strike plate sits flush with the surface of the jamb. This will be a pattern of removing wood, test the fit and repeat. Once you have the surfaces flush, you can screw the strike plate to the jamb.
If the door doesn't latch in the strike plate, it may be that the gap between the door and the jamb is too great. It's not likely that you can make up the distance with shims behind the strike plate, rather you will have to move the jamb. This is more involved as you need to remove the door molding and goose out the jamb. You can add shims in between the jamb and framing and nail through the entire surface, then reinstall the moldings.
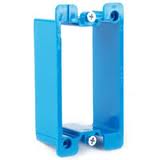 I got a call from a friend with an electrical problem. He was having granite installed and chose to run it up the backsplash. The problem was that the granite was ¾” thick and when he went to install the outlet covers back on, they didn’t reach, as the outlet was recessed in it’s old location. The answer is a box extender, also known as an extension ring.
An extension ring allows you to extend the junction box to meet the new surface of the granite, in this case. You can also use an extension ring outdoors if, for example, you were adding conduit to a run.
The box extender is simply a ring that extends the junction box. Turn the power off to the circuit and unscrew the outlet or switch. Gently pull the outlet or switch slightly away from the box and maneuver the box extender over it. The box extender gets secured to the junction box, and then the outlet gets screwed to the box extender. There are holes in the box extender for this. Once you have the outlet screwed to the box extender, you can install the outlet cover over it and everything will be flush with the surface.
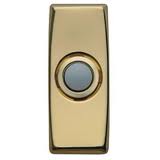 A doorbell button is simply a switch. It controls when power will flow and make the chime unit sound off. The doorbell connects the power and causes the transformer to ring the chime unit. So when a doorbell isn’t working, it can really only be a couple of items to look at: the doorbell button, the wiring, the transformer, or the chime unit.
Testing the doorbell button is easy. You will first need to remove the doorbell button and cover. Sometimes the button has two screws that hold it to the wall, but in many cases, the button is pushed into some caulking. If you don’t see any screws on the housing, try to pry it off of the wall. Even if the button does have screws, there usually aren’t and holes in the wall for the screws to go into, so in that case, the screws will just rest slightly in the house’s exterior surface, whatever that may be.
With the button pried off of the wall, you will see two wires connected to the back of the housing. These are low-voltage wires. Remove these two wires from the back of the housing and touch the two wires together. If the doorbell chimes (makes the “ding-dong” sound), then the doorbell button needs to be replaced. Touching the wires together effectively does what the doorbell does.
 Irrigation valves generally sit below ground in a box and sometimes end up submerged in water. It’s no wonder they don’t last forever. Occasionally, you may find that a sprinkler valve won’t fully shut off. It’s time to investigate.
Pop the top of the irrigation box and determine which valve is running. You can usually do this by feeling the valve. You will feel for a small vibration in the valve…it will also be the coolest as fresh water is constantly running through it.
It may be that there is debris in the valve which is preventing the valve from operating properly. To check, unscrew the series of screws that hold the top of the valve to the bottom of the valve and carefully lift off the top. You will see a gasket between the two pieces. There will be a rubber diaphragm in the center of the bottom half of the valve. Look for dirt or debris around this area. You should also look at the general condition of the diaphragm. Look for damage or small holes or tears in it. You can buy a replacement or just reinstall the old one if it looks good.
Once you reassemble the valve, turn on the water and test for leaks and check to make sure it actually shuts off the water correctly.
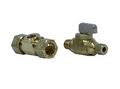 Plumbing water to an icemaker is very straightforward. It’s hard to say what situation you will be dealing with. You may already have a valve behind the refrigerator, or you may have a copper line stubbed off.
The refrigerator/freezer will usually come with an installation kit which will include a water line and sometimes a filter. The issue though is getting the water from the wall to the icemaker.
If you have a copper line coming from the wall, you can use a plumbing valve with a compression fitting on either side of it. You will need to remove the cap on the copper line and slide the nut from the valve over it. Then slide the ferrule onto the end of the copper line. Push the copper line into the valve and tighten the nut over the ferrule so that the ferrule compresses between the two. Repeat the same procedure on the other side of the valve connecting the water supply up to the icemaker. Tighten all fittings snugly and then turn on the water.
If you are using a filter, run a couple of gallons through the filter to wash out any debris before you connect it to the icemaker. This is easy if you are able to get water from the door, but if not, point the line into a bucket and flush it out.
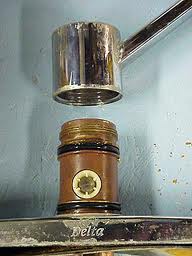 A faucet that leaks at the base of the spout might not actually be leaking where you think it is. Since water runs downhill, check around the aerator to make sure the water isn’t dripping from there are simply running down the underside of the spout where it collects on the base of the faucet. It may be that you can remove the aerator and clean it up and the leak will stop. Otherwise, you have a decision to make.
If you have a single handle faucet with this problem, the repair is pretty easy. If you have a faucet with separate handles, you might consider replacing it if you have a lot of corrosion around the base. The choice is yours.
If you have a single handle faucet, you can replace the O-rings. You will need to remove the handle, which involves lifting a cap and removing a screw. You can jiggle the spout back and forth while lifting it off. You will see two O-rings on the faucet body, one at the top and one at the bottom. Replace these O-rings and use plumbing grease or liquid soft to lubricate them. You don’t want these to twist as they will allow water to pass and leak out. Once the O-rings are on, carefully slide the spout back on.
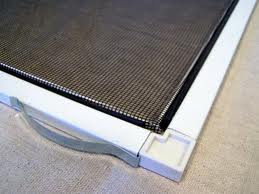 Installing window screen mesh isn’t difficult, but you need to make sure the window frame (or door frame) isn’t bent. If the screen’s frame is bent, it will be too weak to hold the tension of the screen as it is stretched across the frame. If you use the right material, the job is easy.
Choose the right thickness of window frame. The screen’s frames come in 2 different thicknesses, so measure before you go buy a replacement, or better yet, take a piece of the old frame with you so you can compare the thicknesses. If you are reusing the old frame, make sure it is in good condition.
Most of the screening materials are fabric (rather than the old style metal), and they last long and trim easily with a utility knife. Also get the right size of spline. The spline is the rubbery cord that holds the screening material in the groove. Too fat and it’s too hard to push in…too thin and it won’t hold tension.
Cut the piece of screening so it overlaps the frame by a few inches. Start at a corner and push the spline into the screen until it rests in the groove. A spline roller is best for this as it won’t cut the fabric and you can roll it down the length of spline quickly. When you come to a corner, you may have to tug a little on the screening material and carefully push the spline into the groove, but it is quick. You may also have to cut the screening material at a 45-degree angle outside the frame so that it lays flat and doesn’t wrinkle.
When the entire screen has been rolled, use a utility knife and cut the screening material against the frame.
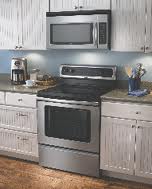 Having a handyman install a microwave hood above the range is a great convenience and a space saver. Removing the builder-grade vent hood takes just 5 minutes and the removal of four screws, but some people have difficulty getting the electrical cord run up into the cabinet.
The old vent hood will have a cord that runs through a hole and into the wall cabinet. Too often, people attempt to force feed the cord on the new microwave hood into the hole of the old vent hood. In most cases, the hole is in the wrong place and so the thick cord can get pinched between the top of the microwave and the underside of the cabinet. It is much easier to cut a hole in the correct location. This way the cord isn’t pinched and the microwave sits correctly without having to force it.
The new microwave should come with a template that shows you the exact location to cut the hole. Tape the paper template to the underside of the cabinet and mark out the hole. Use a hold saw and bore the hole. If you don’t have a hole saw you can drill a series of holes and just cut out between the holes. You can also use a jigsaw if you want. It doesn’t have to be pretty, just functional as the hole won’t be seen.
Once you have the hole cut, you can hang the microwave on the wall bracket and feed the cord through the hole to plug into the outlet in the cabinet.
 There are a variety of reasons you might need to cut the drywall open. Maybe you need access to the plumbing, or maybe you are adding an electric outlet. Regardless, there are a couple of ways to cut open the drywall.
The first thing to do is to make sure you will be cutting where you need to cut. For example, use a stud finder and know where the obstacles are behind the wall. Once you have that marked out, you can cut the hole. Cut the wall the minimum size necessary for you to do the job. You will likely be patching, at least partially, the area you are cutting…so cut wisely.
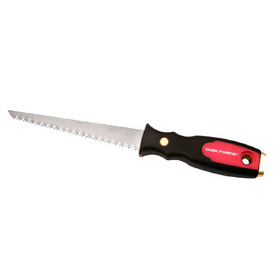
I know some people who use utility knives to cut drywall. This is fine if you are cutting up sheets that haven’t bee installed. In that case, it is a simple matter of cutting the paper on one side, snapping the board, and cutting through the paper on the other side. But for cutting pieces installed on a wall, I would use a drywall saw.
A drywall saw is a stiff, sharp tool that allows you to not only push it through the surface of the wall, but also to cut the drywall. Use shallow strokes here. This might require you to hold the handle close to the wall and cut at an extreme angle. This is fine, as we just want to avoid hitting a cable or pipe lying behind the wall.