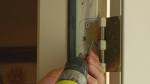
 I was at a house the other day where a door hinge had been flopping around. The screws holding the hinge to the jamb were stripped out of the wood jamb and were not providing any holding strength. It was an interior door, so there wasn't an issue of security or the door dragging or binding, a common job for this Las Vegas handyman.
There are a couple easy fixes on this. The first is to use a larger screw. The screws provided with hinges are very small with a fairly weak thread profile. This small screw screws into the jamb and holds the door hinge. Use a longer screw to screw past the door jamb and into the frame of the door opening. I would suggest a 2 1/2" screw for this.
The other fix uses a wooden golf tee. Slather a wood golf tee with wood glue and tap it into the old screw hole (you may need to drill out the hole if it is too small). Once the glue dries cut off the golf tee flush with the jamb. Pre-drill a new hole into the end of the golf tee, and this will be your new screw hole.
This is a great fix for cabinet door hinges too.
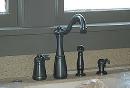
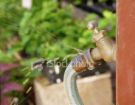 If you've ever had a dripping hose faucet (aka a hose bib) handle , you know how frustrating it can be. You can turn the handle as hard as you can and yet it still won't stop leaking around the handle. This is true for washing machine hose faucets as well. Sure you could replace it, but try a quick repair first.
The handle is attached to the faucet via a cap. This cap screws onto the hose faucet. The first thing I would try is to tighten this cap by a quarter-turn. This may stop the leak, but you may notice that it is harder to turn the faucet on-and-off. Personally, I can live with that.
Underneath this cap is the secret to no leaks: packing. Packing looks like a small rope made of Teflon, and it comes in a variety of diameters. You wrap this packing around the stem and as you tighten the cap back down everything compresses to seal out any leaks. If you add packing and it still leaks you can add a little more.
Had the faucet leaked at the spout (where water is supposed to run out), you could have tried to disassemble the faucet and replace a washer, or just replace the hose faucet.
 A common repair we get is for a towel bar that has come loose. Actually, it's not a repair of the towel bar, but rather a drywall repair. The towel bar in usually installed with more importance on the cosmetic rather than the soundness of the installation. Typically, it is screwed into drywall rather than into a wall stud.
Along comes a child that thinks it would be fun to lift up themselves on it, or an adult that loses his balance, etc. The result is that the drywall develops an elongated hole from the screw or wall anchor, and the towel bar becomes loose.
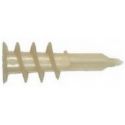
You can try to move the towel bar over enough to bite into fresh drywall or even a stud (if the mounting plate/escutcheon is large enough) and re-install it. The most common solution though is to use a larger wall anchor. You can use a small toggle bolt (aka molly bolt), an EZ anchor, or a large hollow wall anchor. For the larger wall anchors, get the kind that have tall sharp teeth. These will really bite into the drywall and give a good amount of strength. Simply place the sharp point of the anchor against the wall and screw it in. Then place the mating screw into the towel bar's mounting plate and screw it into the toggle. The only downside is that if this pulls out of the wall, you will have a drywall hole of about an inch around.
 It always seems that water heaters time their demise just perfectly-Christmas Eve, weddings and shower time.
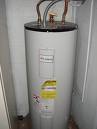
There are several possible causes. So, check the heating elements, the thermostats and the dip tube. An electric water heater uses two heating elements to heat the water: one near the top of the tank and one near the bottom.
The bottom element does the bulk of the heating work, while the top plays backup during periods of high demand. Each element has a thermostat that you can sometimes adjust, but since the heater was working fine and only recently started acting up, I doubt that adjusting a thermostat will fix it. (You may have to replace one, however).
A broken dip tube may also be the culprit, as the device is responsible for forcing the incoming cold water down to the tank's bottom to get heated. The hot water then rises to the top and out through your showerhead. If the tube is broken, the cold and hot water mix at the top of the tank and you get hot water-initially, until it turns lukewarm.
The thermostats are located on the side of your tank under metal panels. Turn off the power to the water heater at the main service panel and remove the covers that hide the elements. The first thing to check is if the reset button has tripped on either element. To cure this, just push the red button and it should resume heating normally. Realize though, that there may be an underlying problem that made the button trip.
If you have adjustable thermostats, you can use a screwdriver to change the setting. Turn the screwdriver clockwise for hotter and counterclockwise for a cooler heat setting. Like I said earlier, I doubt this will fix your problem.
Start with the upper thermostat and test it for continuity using a multimeter. If it is faulty, remove the wires and unscrew it from the side of the tank. Install a new thermostat and adjust the settings according to the manufacturer's instructions. You can test and replace the lower thermostat in the same manner.
Next, check the heating elements. Again, use the multimeter and test each element. Disconnect one element wire, and then touch one probe of the multimeter to an element mounting bolt, and touch each of the terminal screws, one at a time. If you get a bad reading, you need to replace the element.
To replace the element, drain the tank. Attach a hose to the bottom of the tank at the hose connection and open the valve. You will have to allow air into the system to get the water flowing, so open the nearest hot water faucet after you close the cold water supply valve at the top of the tank.
Once the tank is drained, remove the wires from the heating element and then unscrew the mounting bolts that hold the element in place. Remove the element and replace it with a new one of the same rating. You may find that once you have the element out, it may be covered with caked-on sediment. This could also be the culprit.
After you reattach the mounting bolts and screws, you will have to fill the tank back up with water and turn the power back on, as well as adjust the thermostats. With any luck, you will be enjoying hot showers in no time.
Before you sink money into your water heater, you might consider its age and how many more useful years it has left. If it is 6 years old, is it worth sinking $100 and a few hours of your time into it? Maybe. Most water heaters are out of warranty by this age and it could last a few more months or a few more years. You might consider replacing your water heater.
 Recently I had a customer who had a plumbing line break and she needed to shut off the water to the house. She didn't know how. She was recently single and never had to worry about it. So this Las Vegas handyman walked her through it over the phone. Then it dawned on me that I'll bet there are a lot of people who don't know how to turn the water off during an emergency. So here goes.
Most plumbing fixtures have water shut-off valves to isolate that fixture. For example, toilets and faucets will have a valve at the wall to shut off the water. Plastic piping, such as PEX, will have a manifold that will house all the shut off's in a small cabinet. You turn the water off with a small key. So if the toilet, for example, is running and you don't know what to do...well you can just reach over and turn off the valve. There is no urgency there.
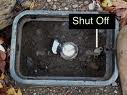
However, if a pipe in a wall breaks then its time for some quick thinking. There will be main water shut-off outside, usually in front of the house at the sidewalk. Look for a cover at the sidewalk with a small hole in it. You can stick a screwdriver in this hole and pry or lift it off and push it aside (there are usually a lot of bugs down there so be prepared). In the hole you will see a meter with a clear covering so that you can read the numbers (it will probably be spinning like an airplane propeller due to the amount of water running). Connected to the meter is the shut-off valve. The proper tool to shut off this valve is a water key, which looks like a large letter "T". You put your hands on the top of the "T" and the bottom of the "T" has a slot which mates with the valve. If you don't have a water key don't worry, I shut them off all the time with a pair of pliers, or a crescent wrench and a screwdriver...whatever is closest to me. Turn the valve until the meter stops spinning.
This will shut off the water to the entire house, landscape included. Some homes have a separate valve built in that allows you to shut off the water to the house without shutting off the water to the landscape. If your house has one, you will typically find it in the garage about 2 feet from the floor.
 I had a customer call the other day about a toilet problem. He has a rental unit that hasn't been occupied in a few months. He went by it the other day and found that there was no water in the toilet bowl. That is strange...usually you will find a little water in the bowl. The customer was thinking that since there hasn't been anyone in the unit, maybe the water evaporated. I guess that is possible, but I can't ever remember seeing that occur.
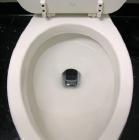
When there is no water in the toilet bowl, there is nothing to seal out the sewer smell from entering your living space. The sewer gas is kept out of your living space because the water creates a seal in the trap of the toilet. He poured some water back into the toilet bowl and re-checked it the following day. Sure enough the water was gone.
I told him there could really be only one explanation...that he had a cracked toilet bowl. Although there was no evidence of water on the floor of the bathroom, there had to be a crack in the trap of the bowl. The water was slowly draining out of the trap and into the drain in the floor. We could have just installed a new toilet bowl, which would have solved his problem, but the homeowner decided to upgrade to a more efficient toilet.
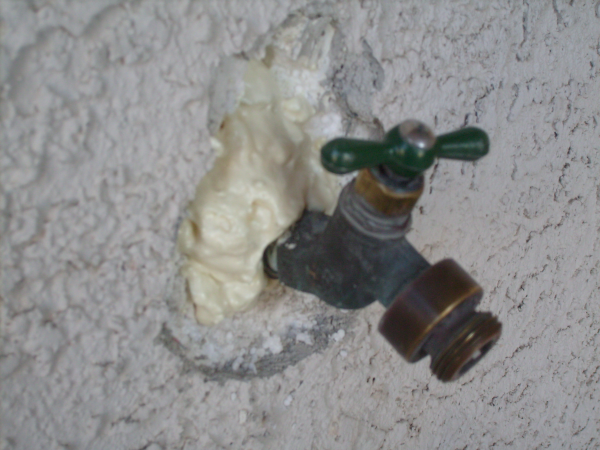 I had to cut into a wall yesterday to repair a plumbing leak. One of the kids pulled on a hose bib and it snapped the copper pipe inside the wall. Last night I repaired the leak and today I start working on the stucco patch. Since there is a good sized hole in the wall I will need to fill it with something so that the stucco won't just fall into the wall. When stucco is first applied, a stucco wire is used to help it stay in place as it goes on with the consistancy of concrete. I know people who fill the void with rocks or whatever is laying around. I used expanding foam because it will insulate the pipe as well as provide a backing for the stucco repair.
Once the foam is firm in about 8 hours, it can be trimmed. After that, mix up a batch of stucco by adding water and fill the hole until it is even with the surrounding surface using a rubber float. Some stucco has a "sand" finish which is flat and looks like sand. The other finish style is very rough. You can try a couple techniques to match a rough finish.
The first method is the splatter method. With the patch flat simply flick small amounts of stucco on the flat patch. You want a somewhat random splatter. You can do this with a brush, float, or even a paint stick depending on the size of the patch. The other method is to get a fairly loose, almost soupy mixture of stucco and apply this to the patch. It won't be as rough as the splatter method but it may be what you are looking for.
After the patch dries, paint the patch or the entire wall. The paint is the key to a good patch. You can have a bad looking patch, but if the paint is a dead-on match, the patch will appear good.
 Have you ever been standing at someone's door ringing the doorbell and nobody answers? That is the complaint this homeowner received from her neighbor, and that's why we were called. The homeowner needed a doorbell repair.
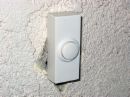
As soon as I walked up to the front door, I made a bet with myself that it was the doorbell button itself. The reason I say this is because it was really loose against the wall. If it is loose, then there's a pretty good chance there is movement which will lead to damage to either the button or the wires behind it.
Most doorbell buttons are fastened to the wall with either a push fitting, adhesive, or caulking. These don't seem like a permanent mounting solution, but that's the way it goes. If you pull the doorbell button away from the wall, turn in over and check the back. You should have 2 low-voltage wires that connect to 2 terminals. In many cases, one of the wires will be disconnected or broken away from the button. If that is the case just reattach the wire, or strip some insulation off of it and re-secure it. That may fix it.
If you still get no chime ("ding-dong"), remove the wires and touch them together. This will bypass the button and should produce a chime. If you get a chime, the button is bad, so spend $2.00 and replace it. If the doorbell still doesn't work, read this article about doorbell repair.
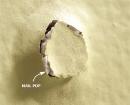 You've probably seen areas in your drywall that have small areas standing proud of the surface. These areas are about the size of the head of a nail right? The official name of this phenomenon is called a "drywall nail pop". It is a drywall repair that you typically see them around stairs where the vibration of people moving on them causes slight movement. This vibration will work a nail out of the drywall and cause the head of it to "pop" out. This can be ugly, especially if you have an entire column of them popping out. Repairing them is actually pretty easy.
You first need to dig out the popped nail. I usually try to be as neat with this as possible since you will have to fill the hole that is left. Try digging out the nail head using a sharp utility knife to cut away the texture or drywall at the nail head. Then use pliers to grab the head and twist it back and forth to wiggle it free.
With the nail removed, screw a drywall screw above and below the nail location. I prefer course threaded drywall screws, 1 5/8" long installed one inch above and one inch below the nail's location. Push on the drywall as you screw them in. You want to screw them into the stud so the screw head ends up just below the surface of the drywall. If you can run a putty knife over the area and not hear a metal "clink", that's deep enough.
The rest is window dressing. Fill in the divots, float the area (if it's bad enough), texture if necessary, and paint it. The screws will hold far better that the nail. You can go here for details on drywall texturing.
 I was at a customer's house yesterday and she asked about a kitchen sink remodel. I figured she just wanted to replace her kitchen sink. No, she specifically wanted her existing kitchen sink remodeled. Okay...I'll play along, so I asked her what she meant. Well, her husband had removed the reverse osmosis water system which left a hole on the top of the sink next to the faucet. She wanted to cover the hole with something.
I suggested a couple of things. First, and least expensive, was a cover to match the sink's surface. You can buy these in a variety of colors and they just pop right into the hole. It does stand out however, and she didn't like this idea.
Next I suggested an instant hot water unit. This is a little machine that fits under the sink and produces hot water. This is perfect for tea or instant soup. She didn't like this either as she just went through the water leaks with her old reverse osmosis unit.
Finally, I suggested a soap dispenser and her eyes lit up. This was the perfect solution. It is inexpensive, functional, attractive, and easy to install. The container is hidden underneath the sink, so that the only thing visible is the dispenser. This Las Vegas handyman made a customer for life.