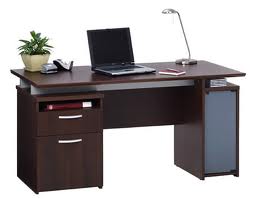
Handyman Tips on Assembling Furniture
 Whether or not you should have a handyman assemble furniture is a case where you must put a price tag on your time. If you flip burgers for a living, maybe you assemble the desk. If you are a corporate executive, maybe you consider paying someone to do it. If you enjoy working with your hands however, this desk project will be worthwhile no matter what your profession.
A large desk with a hutch can weigh several hundred pounds, as I’m sure you found out when you brought it home. It is likely made of particle board or medium density fiberboard. If you are lucky, you will only spend several hours on the assembly. Still, it may take a chunk of your day.
Fortunately, the instruction manuals are clear and understandable. You will only need simple tools, such as screwdrivers and a hammer.
The large pieces of the assembly (the top and sides) are connected with cam mechanisms on one piece and then mate with a rod on the matching piece. Roughly half of the time it takes to assemble the furniture will be spent placing the cam mechanisms and rods in all of the pieces, as well as the hardware in various pieces.
When it’s time to connect the larger ones, you turn the cam with a screwdriver. This turning action grips the mating rod and pulls the two together for a snug fit.
Since many parts look identical, make sure you orient each piece so that the finished edge is where it should be. Manufacturers only finish the visible edges, so when you are installing the hardware and assembling the pieces, make sure finished edges are where they are supposed to be. It’s a bad day when you finally stand the furniture up and you have raw particle board edges staring at you.
One of the most tedious tasks will be assembling the drawers. There are lots of small pieces that fit together just right. Each side is secured to the drawer front by brackets or grooves while the drawer’s bottom is slid into slots in the sides. The back of the drawer slides down onto the bottom.
Once all of the hardware is installed, you can start assembly. For the larger pieces, this will take place on your floor.
Do not stand the structure upright until you nail the back on it. The back holds all the pieces squarely so they won’t collapse. Nail it on and then you can stand the piece up.
All that’s left is to slide the drawers in and place the plastic covers over the cam mechanisms to make them blend in a little.