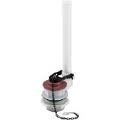
 Water leaking off of the toilet tank bolts suggests a couple of things. Maybe a tank bolt has corroded and broken, or maybe the tank is cracked. It’s interesting how a tank cracks. Sometimes, someone will over-tighten the nuts which will crack it, and other times people will push back against the tank while they are seated on the toilet. I mean…it’s not a recliner right? Regardless, you will need to check for a cracked tank before you replace the bolts.
If the tank has a crack, replace it. Otherwise, you will just be replacing the tank bolts, washers, and nuts.
There is not a lot of science to this. Hold the nut on the bottom and unscrew the bolt with a screwdriver (drain the tank first and turn off the water so it doesn’t refill).
On the new bolt place a metal washer next to the head and then a rubber washer to stop water from escaping. On the underside of the bowl, you are going to place a washer and a nut and tighten snugly…but don’t over-tighten!
Most tanks have 2 bolts, but some have 3. Tighten them uniformly. In other words, don’t fully tighten one and then move to the next. Rather, tighten one a little, and then the other…gradually tighten each one until snug. How tight to tighten the nuts is a matter of blind faith. You want them tight enough to stop any leaks and movement of the tank, but not so tight that they crack the tank.
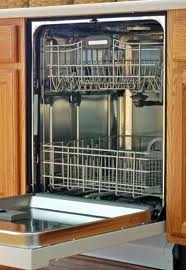 So your dishwasher looks great sitting in the cabinet…until you go to open the door. When you open the door, does the entire appliance tip forward? If so, you have a very easy repair on your hands.
The dishwasher is held in place by two screws. They screw into some brackets at the top of the dishwasher and into the underside of the cabinet. Like you, you find out they are missing when you open the door and the dishwasher lands at your feet. Securing the dishwasher is easy.
Make sure the screws you are using won’t protrude from the countertop above! Typically you have plenty of room, but be wary of the length of the screws you are installing and the thickness of the wood sub top you are screwing into. Solid surface countertops will have a wood sub top underneath them that are ¾” thick, so don’t use screws that are longer than this or you risk damaging the countertop.
Center the dishwasher in the opening and make it flush with the front of the surrounding cabinets. When you are happy with the placement, hold it in place and use a drill driver to sink the screws into the underside of the countertop. The dishwasher should stay in one place as you open and close the door.
 Matching paint for drywall repairs is not easy. Even if you have the original paint, it probably won’t match the paint on the wall due to different factors. I can’t tell you the number of times I will ask a customer if they have the paint to match. They will say, “its just regular old white paint”. Sorry folks, there is no such thing as “regular old white paint”. There are, however, about 40 different shades of white paint to choose from. There is antique white, Navajo white, milk white, clean white, cottontail….you get the idea. Choose poorly and the wall repair will stand out. Choose wisely and your repair will disappear.
The computer matching services are pretty good so long as the machine has been calibrated. Cut a small sample from an inconspicuous area on the wall to bring in. Cut just through the painted surface so that the blade just cuts the top later of drywall paper. Peel this off and take it with you. Doing this will give you a good paint sample to match from, and you won’t have a hole to patch…only the surface and texture. Have the paint store blow the match dry right on your sample to see how far it is off. If you can see his spot on your sample you will see your drywall repair.
Once you can no longer see the paint on your sample, you have a good match. Retexture the small spot on your wall and paint the area. If you don’t have a good match, you will have to paint the entire wall to blend it in.
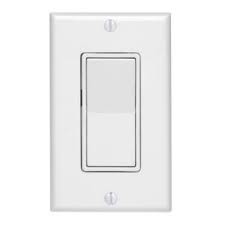 Upgrading your electric light switches is a reasonably cheap way to make your interior look 20 years younger. At less than five minutes per switch, you can do the entire house in an afternoon.
Back in the day, builders all used the small skinny light switches. They are cheap and are available anywhere. However for about $1.50 per switch, you can upgrade to a decora switch. Decora switches are modern. They are wide and flat and have a fulcrum that you toggle for on and off. You can get these switches for any switch needs, such as dimmer switches, two-way, three-way, and four-way switches, and you can buy some that even illuminate. Installing them is exactly like installing the old-fashioned switches. You will have to buy a new faceplate with each switch.
Turn the power off, remove the faceplate and loosen the screws that hold the old switch to the box. You are simply going to replace the wires in the same positions on the new switch that they were on the old switch. Loosen the terminal screws on the old switch, remove the wire and wrap it clockwise around the new switch’s terminal, and tighten snugly. Re-secure it to the box and install the new faceplate.
 A leaking toilet can be very frustrating. You can see the water running slowly from the tank into the bowl. If you have already replaced the flapper, now what?
The answer is to move downward. If the flapper is new and properly seating against the flush valve, check to make sure the rim of the flush valve is smooth and not pitted. If it has bumps around it, water will sneak through and drain into the bowl causing it to phantom flush. If it feels rough, you can install a “flusher fixer”. This is a new flapper assembly with a gel ring on the bottom to fill in any pitted areas.
The next step would be replacing the flush valve and finally the tank. Remove the tank and check it for small cracks. If you see any, buy a new tank and install it. Otherwise replace the flush valve. This is done by turning the tank upside down and loosening the spud nut. Once the nut has been removed, the flush valve will lift out of the top of the tank. Make sure you reseat the new flush valve with washer into the hole and compress it by tightening the spud nut. The spud washer goes over the nut and the tank goes back onto the bowl with new bolts, washers, and nuts.
 Have you ever flushed the toilet and the water level in the bowl starts to rise? Instead of flushing the contents down, the level in the bowl starts to rise. What to do?
There are a couple of quick things you can do to prevent the water from going over the edge of the bowl. First things first, stop the water from running. You can turn the water supply valve clockwise to shut the water off. However, these sometimes will leak themselves, although they will generally shut the water off to the toilet.
In the event you have a manibloc system and don’t have a water shut off valve at the wall behind the toilet, you can lift off the lid of the toilet tank, and lift up on the fill valve. This will also stop the water from entering the bowl. Realize though, that the water will only stop running for as long as you lift the fill valve. Generally, the water will slowly recede to the point where you can lower the fill valve so the tank refills.
The root of the cause is that the toilet is clogged. There are a variety of ways to unclog a toilet. Here is an article on how to unclog a toilet.
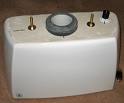
 A sprinkler valve is the gate keeper for water rushing to your sprinkler heads. If there is a problem with the valve either the water won’t turn on or it won’t turn off.
The problem is usually with either the diaphragm or the solenoid. Both of these parts can be changed quickly, but you need to get the correct parts. There are small differences in these parts which can make your repair fail.
You can get the make and model number of the valve and bring it with you. Turn the water off and let the pressure out of the system. The solenoid will just unscrew from the top of the valve. To access the diaphragm, you will need to remove all of the screws that hold the top of the valve to the bottom of the valve. Lift off the top of the valve and install the new diaphragm, then replace the screws.
If you are replacing both of these parts, you might just consider buying a new valve and installing the new top half of the valve onto the body of the old valve. In this way, you are basically getting a new valve, without all of the work of digging out the old one and gluing the piping together.
 As people age, the potential for a fall increases…especially on a wet surface like a shower. Grab bars can save the day. I usually start by asking the customer how they will use the shower and determine placement from there.
It is a good idea to install a vertical bar at the height of the customer’s shoulder at the entrance to the shower. They will hold onto this bar as they step into and out of the shower. It is important that this bar be at shoulder height to minimize the distance of the fall should they actually slip. By having it at the shoulder during a fall, they could react and slow the rate of decent. By contrast, imagine if they had a handrail at waist height. If they fall they likely wouldn’t have the strength to slow or stop the fall.
The other location to have a grab bar is on the long wall of the shower. This is where asking about the customer’s showering habits helps. Does the customer use a bath chair to sit down during a shower or do they stand up? This matters because if they sit down, the grab bar should have an angle to it so that they can pull themselves up from the chair. If they stand up during a shower, the bar can be horizontal or have an incline to it.
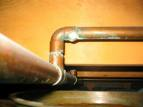 Copper plumbing is great to work with…clean the fittings, flux and heat them up to solder them in place. But what about removing a copper fitting?
There really aren’t many surprises here. It is a matter of heating up the fitting to remove it.
Turn off the water and drain the area so that the piping and fitting do not have water in them. If there is water in them, the fitting will not get hot enough to turn the solder back into molten liquid which will allow you to pull it off. Instead, the water will turn to steam. Once the water has been drained from the pipes, get ready to fire up the torch.
Have a bucket of water nearby in case things go badly. It’s also a good idea to use a fire cloth to protect the area just beyond where you will be applying the torch. Apply the torch to the fitting and move the tip of the blue flame back-and-forth over the surface so that the entire fitting gets hot. Use large channel locks, pliers, etc, to periodically pull on the fitting. As soon as the fitting is hot enough the solder will liquefy and you can pull the fitting off and turn off the torch.
Remember that heat transfers through metal very quickly. Don’t hold onto the hot pipe or fitting for too long with a metal tool or you will feel the heat in your hand. Once the fitting and the piping has cooled you can make your repair.
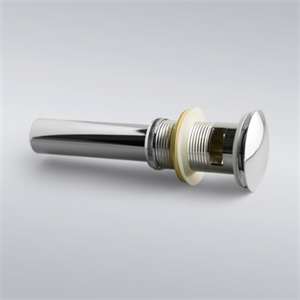 Removing a bathroom sink drain involves some tools and a little wrestling. These parts can be corroded and will fight you from removing them.
Generally, the only time you will replace a drain assembly is if you are changing the faucet (so the new drain flange looks new as well), or if it is damaged and leaking.
The first thing to do is to remove the trap. This unscrews at the slip nuts. From here you will likely need a pipe wrench to hold onto the tailpiece and another wrench to unscrew the nut that holds the assembly to the underside of the sink. Try not to hold the tailpiece at the threads because you may need those threads to get the assembly out. The pipe wrench will mangle the threads.
Depending upon which style you have, the flange may screw onto the end of the threads, or the flange may be fixed onto the end of the tailpiece. Loosen the nut and you will be able to see the flange. Once you get the nut down an inch or so, push the assembly upward out of the sink. You can try to grab the flange with pliers and turn the tailpiece to break them free. The tailpiece may also be in two pieces. As a worst case scenario, you can always move the nut down and out of the way, and then cut the tailpiece above the nut and under the sink’s bottom. Then the flange will lift right out.