 Painting baseboards is no fun. You risk spilling paint on the flooring and if you have carpet there, the fibers can pop up and imbed themselves in the paint. You also have to be on the mark with a cut-in line if you have a different color of paint on the wall. So given all of the extra work and risk, wouldn’t you rather do something else than repaint the baseboards?
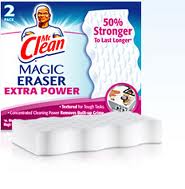
The cleaning aspect is easy if you have semi-gloss paint on the baseboards. You can even use a damp rag or sponge to wipe away the dirt. But I’ve found a product that has been around awhile that works great. Try using a “magic eraser” by Mr. Clean. You can get them at most grocery or department stores and they will save you a lot of time. Get the eraser damp and wring out as much water as you can. Then just wipe the surface you want clean.
You will need to put a little elbow grease in it, but it is pretty surprising how well they remove scuffs and dirt. I was really impressed with how well they remove scuffs that I thought had to be painted. There was just no way the scuffed up surface would look new again…but it did. You will find that the more you scrub a surface and the longer you use the eraser, it will begin to erode and shrink down to the point that you get a new one. This is a no-brainer alternative to painting…and it works on walls too. Just test an area first to make sure it doesn’t change the appearance.
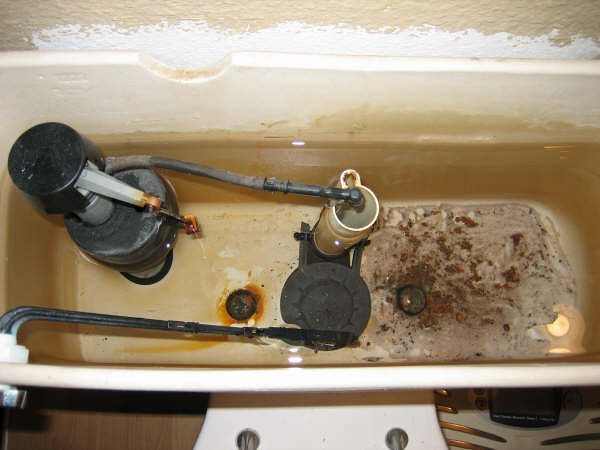 Rusting toilet tank bolts can be surprising. Either you didn’t realize it, or you noticed a drip which caused you to look at them. Sometimes during a quick adjustment, you lift the lid of the toilet tank and you see two giant balls of rust. Underneath all of that rust are the heads of the tank bolts. It’s a good idea to replace them even if they aren’t yet leaking.
You may find that when looking underneath the tank (there the bolts are held to the bowl with washers and nuts) that there is a large amount of rust and corrosion here too.
The first step is to remove the old rusted bolts. Usually, you would use a screwdriver and a wrench. The screwdriver is for the bolt head and the wrench for the nut underneath the tank. However, with all of the rust and corrosion, you won’t be able to get it to budge. Sure you can try, but you may even snap the bolt, which is fine.
Try a hacksaw and cut through the bolt. This will allow you to pull the tank off of the bowl but you will be left with the stubs of the bolts sticking out. Tap lightly on the stub and push the bolt head out. You will need to clean up the area where the old bolt head was or you may develop another leak if the new washer doesn’t sit right.
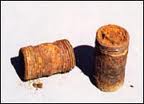 If you’ve ever been working on a water heater and one of the nipples won’t budge, you know it can cause panic. Generally, try some penetrating oil, get a larger wrench or use a cheater bar to extend the levering action. This may cause the nipple to snap off which will make anyone weak-kneed.
It may look bleak seeing the broken nipple lodged in the water heater, but there are ways to remove it. There are nipple extractors, but I like to use a combination of tools to remove the broken nipple.
Take a hacksaw blade out of the frame so that you are holding just the blade. It usually won’t cut you, but use it carefully anyway. Some heavy gloves will help grip it and protect your hands. You are going to place the blade into the middle of the nipple and cut from the inside of the nipple towards the threads on the outside of the nipple. You must take great care NOT to cut through the threads. The goal here is simply to weaken the wall of the nipple so that you can collapse it. Check your cut regularly to make sure you don’t hit the threads. Once you have cut to a depth you feel comfortable with, use a chisel and hammer and hit the edge of the nipple inward at the point where you made the cut. This is the weakest part of the nipple. As you tap on the nipple you will see it cave inward along the cut line. Continue this until you can grab the metal and twist it out, or just keep hitting the nipple along the perimeter of the opening until it is weak enough that you can pull it out.
 A dishwasher air gap sits in between the drain hose and the end point where the water drains out (typically the garbage disposal). Some people don’t install an air gap and instead just connect the dishwasher drain hose directly to the garbage disposal inlet. That’s a no-no.
It is not difficult to install an air gap for the dishwasher. You will need about $20 in parts and about an hour of your time.
You will need the air gap itself, a hose that runs from the air gap to the dishwasher, and a handful of hose clamps to hold everything together. Ideally you need a hole in your sink or countertop for the air gap to sit (although some people will just attach the dishwasher drain hose to the underside of the sink creating a “high loop).
Under the sink, connect the dishwasher hose to the small inlet of the air gap with a hose clamp. Connect the larger outlet of the air gap to the discharge hose that you bought and the other end to the garbage disposal inlet (be sure you remove the knock-out plug from the garbage disposal first) and secure everything with hose clamps. Push the air gap into the hole in your sink or countertop and screw on the retaining nut. Then you can install the decorative cover over it. Run the dishwasher’s “rinse and drain” setting and check for proper operation.
 Having to push hard on your door in order to get it to latch is much more common with exterior doors than interior doors. That would be due to things like weather and weather stripping. Exterior doors have more things to get through to latch than do interior doors…things that rub together to seal out the elements…like a door sweep, threshold, and the aforementioned weather stripping.
So there are a couple things you can do to try to ease the pain in your shoulder from throwing it into the door to close. You can first try to adjust the door’s strike plate so that the door doesn’t have to travel as far to latch. You would effectively be moving the strike plate away from the exterior side of the door. This might not be so easy, especially if you are only moving the plate a small amount. The screws may tend to wander back into the old holes. If this works, great…but don’t sacrifice gaps in your door weatherization so that it is easier to latch. If you can see daylight, that is a problem. You can also try to use a metal file and file away a small amount of the door strike.
You can also choose to replace the weather stripping. You might try a less dense weather strip so that it compresses easier which will allow the door to close with less effort. Additionally, check the door sweep to make sure it is lightly touching the threshold instead of dragging on it.
 The door from the garage into the house is supposed to be self-closing. Problems occur with these doors as they seem to either slam closed or don’t close hard enough to latch.
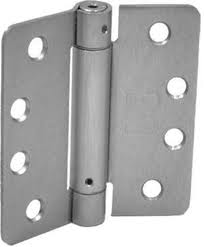
The fix is in the hinges and possibly even the weather stripping. Depending on the weight of your door, you will either have a self-closing hinge at one location or two locations. You can adjust them for more tension or less.
If the door is slamming, ease back on the tension. You can stick an Allen wrench in the top of the hinge. Some hinges require you to push down on the hinge to release all of the tension and then retension the hinge by turning the wrench. You will hear a “clicking” sound as you do this. Other hinges require you to turn the wrench and pull out the pin, gently ease back on the tension and then reset the pin in a hole to hold the tension.
You might also look at the weather stripping. It may be that it is so dense and stiff that it doesn’t allow the door to latch and instead bumps it back open. So sometimes you get a repetitive banging noise. So you can also try to replace it with a less dense weather stripping.
 If you have a cabinet door that won’t stay closed, it may only be a simple adjustment to the hinges. If that doesn’t work, you will need to get more creative.
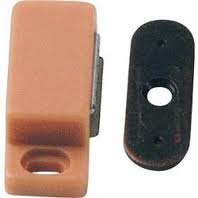
If you have European hinges, you can adjust virtually every movement of the cabinet doors…including closing the door. However, if you have standard surface mounted hinges, you could install a mechanical or magnetic catch.
In my opinion, magnetic catches are easier to operate and place less stress on the cabinets. With magnetic catches, there is a metal piece and a magnetic piece. When they touch they hold the two surfaces together. They also open relatively easily. With mechanical catches, you will have a piece that usually has a protrusion that mates with a receiving piece. They are somewhat harder to push in and pull out, which places stress on the cabinet. However, they do have better holding strength. To hold a cabinet door to a frame, you really don’t need a lot of strength, just enough to hold the two pieces together.
The catch is mounted on the inside of the door and the mating receiving piece is mounted on the perimeter of the door frame. In this way, they are hidden from view when the door is closed. Unless the mechanical pieces are installed with the right spacing, you still may have a gap when the door is closed.
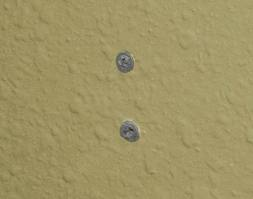 If you have ever had to remove drywall anchors from the wall, you know what an ugly mess they can be. It’s not like a small nail hole that you can just fill. Some wall anchors leave a very noticeable hole in the wall. The problem isn’t so much removing the anchors, but rather what to do after you’ve removed them.
Some drywall anchors push into the wall, and some screw into the wall. For the anchors that screw into the wall, such as the EZ toggle, you can just unscrew them. These anchors have large threads that bite into the drywall and will leave a hole in the wall about the diameter of your pinky finger.
For anchors that push into the wall, they generally have some type of texture on them to help hold them in place. Many will have little arms that, when a screw is installed in them, will push out against the drywall to help hold them in place. They will have a lip that you can grab with needle nose pliers and pull out of the wall, or you can simply push them into the wall and let them fall into the wall cavity.
Once the drywall anchors are removed, you can decide how fancy you want to get with the repair. At a minimum you can fill in the hole with drywall mud or spackle. If it is really unsightly, you can spray a little texture on it before you paint it.
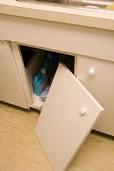 Cupboard doors do sometimes have a mind of their own. But falling down? That is pretty extreme. I’m wondering how much abuse they have suffered.
Cabinet doors have either fixed hinges or adjustable hinges. Either style can be abused and will cause some play in the hinge. If a door gets opened too far, it can place lots of stress on the hinge and cause it to become loose. In fixed hinges where the screws go through the hinge and into the door, the stress can cause the screws to become loose or even split the wood in the door or frame. On adjustable hinges the screws that hold the two pieces of the hinge together can become loose and pull apart. This will cause the door to become separated from the hinge and fall down or at the least pull away from the cabinet. Since these doors have two hinges, it isn’t likely that the door will completely fall off and hit the floor, unless both hinges are loose and damaged.
It is probably a good idea to secure the hinges back quickly to avoid any further damage. On non-adjustable hinges, you can add some toothpicks and wood glue and then reinstall the screws. For adjustable hinges, mate the two halves together and tighten the screws. Being a little gentle on your doors probably wouldn’t hurt either.
 Replacing a door can be challenging. If you are replacing the door and frame, the first step is removing the old frame from the opening. This is called a pre-hung door since the door is already hung from the frame. Removing the old frame sometimes takes a little finesse to save the molding around the perimeter of the door.
The door frame is nailed through the rough framing of the opening, whether it is an interior door or exterior door. The key here is to gently remove the molding on both the interior and exterior of the opening. If you are planning on replacing these anyway, you can just bulldoze through them. Most people will reinstall them as they match the rest of the molding. Cut through the caulking with a utility knife at the perimeter of the molding and then gently goose up an edge. Once you can slide a screwdriver or pry bar under it, just shimmy the bar along the length of the molding. Be very careful here though, it doesn’t take much to snap the molding and send you on a shopping spree.
Once you have removed the molding, you can cut out the door frame. Use a reciprocating saw with a demolition blade in it and run the blade along the perimeter of the door fame. The blade will cut through virtually anything in its path…nails, wood shims, etc.
At this point the frame will be free for you to pull out and haul away.