 Fixing a leaking faucet takes a little know how on how they control the flow of water. For a single handle faucet, you will have a cartridge that gets replaced. For a two-handle faucet, there is a stem and a seat. If you replaced the stem, I would look to either replacing the seat or resurfacing it.
The seat acts like a base upon which the stem rests against. To allow the water to flow, the stem moves and allows water to pass. Stopping the flow of water happens when the stem contacts the seat and stops the water…except when the seat is pitted.
You can replace the seat with a seat wrench. Stick the wrench into the seat and unscrew it. This isn’t as easy as it might sound, as you probably will need some elbow grease to loosen it. Take the seat with you to get a new one and reinstall it.
Your other option is to resurface the seat. You can buy a seat dressing tool which slides down the opening and contacts the seat. On the end of the tool is an abrasive tapered end. As you turn the tool, it will slowly grind down the seat to remove the pits and uneven surface. In this way, the seat will have a smooth surface to seal out the water from flowing.
 A handyman doesn't normally work on swimming pools often, but for a leaking pressure gauge, a beginner could certainly do it.
The pool filter pressure gauge sits on top of the filter and not only tells the pressure at the filter tank, but also bleeds out air. Air will rise to the top of the tank which is where the gauge is located. The gauge sits on top of a valve that allows air out.
If the valve leaks while the pump is on, or if you can hear a sucking noise right after you turn the pump off, then the valve is leaking and should be replaced. Fortunately, this is an easy fix.
The valve simply unscrews from the top of the tank. The valve and gauge will usually come in two pieces. Open the valve to allow air into the system and then unscrew the old unit from the top of the tank. The new valve will have an o-ring installed and you can just screw it right on to the top of the tank.
Wrap the threads on the bottom of the pressure gauge with teflon tape and screw it onto the top of the valve. Orient the face of the gauge so it is convenient to see and then turn on the pump. Bleed out the air using the valve an then close the valve when water starts to flow from it.
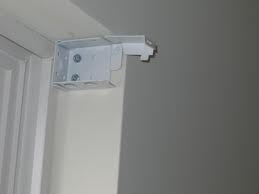 Here is a quick handyman tip that may save you some time and aggravation when installing window blinds. Whether the blinds are vertical, faux wood, mini-blinds, or some other combination, they will all install similarly. You will need to install some brackets on either end of the window, and then install some supports in between the brackets on the top of the window.
Do yourself a favor, and don’t use the screws that come with the window blind. The screws that come with the blinds are small and have small threads with little bite. I prefer to use course thread drywall screws. The nice thing about drywall screws is that you can place them in a drill driver, place the tip of the screw through the bracket and at the drywall surface, and squeeze the trigger. The screw will effortlessly go into the wall and hold the bracket in place. The screws that come with the window blinds are too small for this and are not sharp enough to push into the surface. I would use either 1” or 1 ¼” screws with course threads. These will be long enough to reach the lumber behind the drywall and provide a movement-free installation.
 When your sliding shower door doesn’t slide so well anymore, first you should try to adjust them. If that doesn’t work, you will need to replace them.
The sliding shower door rollers are at the top of the doors. Lift up the door and swing it away to disengage the rollers from the top track. Try to keep the door in a vertical position as they are thin and can be flimsy. Remove the screws that hold the roller assemblies to the door and take the rollers with you to find a match. There are several styles and so you can save yourself unneccesary trips if you buy the right ones.
Reinstalling them is simply the reverse order. You will have to adjust the rollers once you get them installed. Placing the rollers on the track is more “feel” than actually seeing them. The doors are awkward and you will find yourself tipping the door and placing it into the track. You will need to lift the rollers higher than the track (which is concealed in the header) and then set the rollers onto the track.
Test the fit by sliding the door. Does it drag or rub on the bottom? If it does, lift the door again and loosen the rollers to move them lower (moving them lower in effect raises the height of the door). This will prevent the door from rubbing on the bottom.
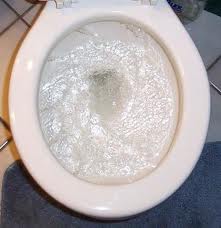 A poor toilet flush can cause the entire household to use a different toilet. Let’s face it, only the rare few want to be blamed for stopping up a toilet. There are a couple of things to look for. Maybe you have a partial blockage, or maybe there isn’t enough water going down the bowl to clear it.
A partial blockage is frustrating because you don’t know if there is something down there or not. I’ve pulled toys, ink pens, glasses …you get the picture. A good plunging or a snake should clear the trap, but you may have to pull the toilet from the floor and clear it from the bottom. You also may have a blocked vent on the roof.
Also make sure you get a good rush of water down the bowl when you flush the toilet. Start by holding the handle down and seeing if the waste gets flushed away. If it does, you can try to adjust the flapper so it stays up longer to allow more water to flow. You can also replace the flapper with a “dial-a-flush” flapper which allows you to control how long the flapper stays up.
Check under the rim of the toilet to see if there are any blocked holes. When you flush the toilet, water fills the rim and rushes out of these holes. Use a mirror (a cosmetics compact mirror is good here). Hold the mirror low enough so that you can see the holes and determine if there are clogged with scale. If they are, you have found your problem.
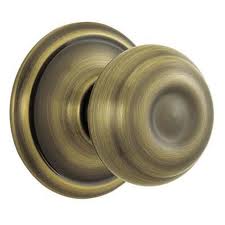 Installing a new door knob handle on a hollow door is really no different than a solid door. For the most part, a door is a door. The cut-out for the knob is the same size and so it will go into the hole for it, regardless of whether or not the door is a hollow core door or solid.
Installing the handle is a five minute process. The handle will come in two halves that go on either side of the door. Obviously, make sure the lock mechanism is on the correct side of the door. On any locking handle, the screws will be on the interior side of the door and the handle side that locks will be on the exterior side of the door. Just make sure you have the correct side of the handle on the right sides of the door.
Install the latch button assembly into the edge of the door. This gets secured to the door with two wood screws. Push the two halves of the knob together and match up the holes. The two halves will mate with the latch assembly so that when everything is together, the door knob will engage the latch and move it in-and-out. Install the screws from the interior side of the door into the exterior side of the handle and tighten them until snug.
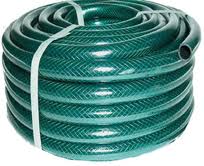 Does your garden hose leak at the faucet when you turn on the water? If you are like most of us, then yes it does. There are several possible culprits, so let’s start with the easy ones and move on.
Unscrew the hose from the faucet and look to see if the washer is still in place. Without this hose washer, water will spray all over the place (it may still spray all over the place but at least not as much). Check the condition of the washer. Is it still squashed or twisted? If so, then replace it.
Look also at the threads of the hose connection. These get stepped on and run over by vehicles. If the hose threads won’t easily thread onto the hose faucet, you will have a leak. It may be that the connection is out-of-round. If so, you can buy a kit that allows you cut it off and install a new one. It is a matter of screwing a collar onto the bare hose which has threads connected to it.
Finally, check the hose bib (faucet) itself. Make sure the water leak isn’t coming from there and leaking down the hose to give the appearance that it’s the hose, when in reality it is not. You might be able to tighten the nut below the handle or just replace the faucet itself.
 If you are planning on replacing your shower surround, plan on a messy job. Depending on what type of surround you are removing, it may come off cleanly, but don’t bet on it. I’ve never had a lot of luck removing a surround and keeping the green board intact. The surround is glued or mortared onto the walls and it isn’t supposed to come down easily, so don’t expect it to.
The best you can hope for is minimal damage. When I say minimal, I mean torn paper on the green board face. You will likely have dried glue or mortar sticking to the green board when the surround is removed. It really depends on the type of surround you are removing.
The best chance you have for “minimal damage” is if you are removing a fiberglass surround. You can start peeling it up and keep gently peeling in the hopes it doesn’t start taking a chunk of the drywall with it. You can try using a stiff putty knife to try to sever the bond between the drywall and the surround.
If you have a tile surround, good luck not damaging the drywall. I say this because it is difficult removing ceramic tile that has been mortared or glued to the wall without making holes in it. You may find it easier to pull down the surround and the green board along with it, then reinstall new green board in its place before installing the new surround.
 Removing a garbage disposal is easy and fast. Maybe you are replacing the unit, or maybe you need to remove the disposal to replace the rubber splash guard.
Unplug the disposal from the outlet and then focus on the drain piping exiting the side of the unit. There will be two screws that hold on the drain piping. Remove the screws and pull back the metal plate that the holds the flanged drain pipe to the side of the disposal. There will be a rubber washer behind the flanged pipe to prevent leaks.
If you have a dishwasher, the drain should run up to the air gap on top of your sink, and then back down to the garbage disposal. You will need to remove the clamp that holds this hose on. Once you pull the hose off, the disposal is ready to be removed.
It is held onto the bottom of the sink by a collar that with lugs in it. Support the weight of the disposal (I usually stick my knee under it) and place a screwdriver or other small stout object in the lug. Once you loosen the collar, the disposal will drop from the bottom of the sink.
 Exterior caulking is good both in hot weather and cold. Weatherstripping your doors is a great idea. It will stop breezes, bugs and other outside nuisances from entering your house. You might venture outside and take a look at what you can do there as well. You should also take along a tube of caulking.
The type of caulking to use will depend on the application, but you will likely need exterior paintable caulking for doors and windows.
Read the manufacturer’s instructions to ensure it is used for its intended purpose.
Caulking is a fix-all for all sorts of situations since it’s a great adhesive in a pinch, but is shines at filling gaps. You might even call it “weatherstripping in a tube.”
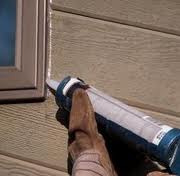
Walk around the house paying close attention to doors and windows. Around the doors, lay a bead of caulking around the perimeter of the door, in between the molding and the siding (or stucco).
Also, check at the threshold of the door and lay down a bead between the bottom of the threshold and the slab or deck. This will help keep bugs out. Plus, on doors that have no protection via an overhang, the bead of caulking will help keep rainwater from seeping under the threshold.
By the way, don’t buy the caulking that’s squeezed out by hand. Use a caulking gun and load a tube into it. Cut the tip at a 45-degree angle. The size of the opening can vary, but start out at about one-eighth of an inch. Use a long nail or piece of wire to punch through to the caulk. Squeeze the trigger and lay down the bead of caulking, and then run your finger over the bead to smoosh the caulk into the cracks.
Check out the windows in the same manner. The general rule: when in doubt, caulk it. Caulk around the perimeter of the window, being careful not to cover the weep holes in the window frame.
Water is a home’s nemesis, so seal around any points of entry, such as vents.
For sealing roof gaps, use a roof sealant (it also comes in a tube that can be loaded into your caulking gun). Now, working on the roof can obviously be dangerous and this is one area where you might consider hiring someone. Not only is working on your roof dangerous, but you can also damage your roof by walking on the tiles.
The idea is to keep the elements outside the house.