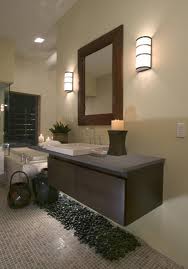
 I often get asked if you can replace one light fixture with two fixtures. I see this most often with master bathroom vanities where you have a long light bar over two sinks. The idea is to remove the single light bar and instead put a smaller light fixture over each sink. Yes you can do this.
There will be challenges with this. You will need to branch off from the single location to two locations, and you will likely have to go through wall studs to get there. You it’s not a quickie job, but it will totally change the appearance of a bathroom.
Use remodeling junction boxes and secure them to the drywall after you have centered them above the sinks. Another great look is to install wall sconces on either side of a mirror for a more indirect lighting approach. This is the same process.
Run the appropriate size NM cable from the new locations to the old, leaving enough cable so that you can strip the sheathing and make connections…usually about 8 inches inside the box, but you can trim it and gently fold the Romex into the box after making the connections. Use wire nuts at all locations until the connections are snug.
You will also have to repair the drywall, texture the patch and paint it to match or paint the entire wall to make the patch go away.
 Many people have a microwave vent hood above their cooktop. It’s a great feature and it saves valuable countertop space. When these are installed, the vast majority are installed so that they recirculate the air back into the living space. Although the air goes through a charcoal filter, you still get plenty of cooking smells thrown back into your face. The answer is to ventilate the unit to the exterior.
Ventilating the microwave hood to the exterior is pretty straightforward as long as the unit is installed on an exterior wall. You will need to rotate the blower so that it redirects the air out of the top of the cabinet rather than through the front vent.
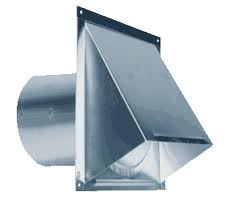
You will need to buy some ducting that will allow you to direct the stream of air up and out of the wall. You will also need to buy a vent cover for the exterior side of the wall.
The vent cover is simply a shroud with some mesh on it (to keep the critters out) attached to a short piece of ducting. Hold the ducting up to your stucco wall in the location where you want it, and draw a line around it. This is where you will cut. A small grinder with a masonry wheel will do a nice job of cutting stucco. Once you have the hole cut, liberally apply caulking around the hole and to the underside of the vent and push it into the hole. This will seal out the weather. Then it is a matter of connecting the ducting together and blowing the cooking smells outside.
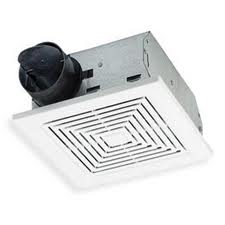 Above the toilet, or somewhere on the bathroom ceiling, is a ventilation fan (or maybe you have a window that you can open). When the fan stops working, there are a couple of things you can do.
Pull off the vent cover and check to see that the fan actually has power going to it. Unplug the fan from the outlet in the ceiling, and test the outlet. If it doesn’t have power, you have found your problem. I would check the circuit breakers to see if one has tripped, and check the GFI’s to see if one has tripped. Reset the offending breaker or GFI.
If the outlet does have power, you know the problem is isolated to the fan itself. Does the fan hum or make a low noise? Sometimes the fan blades will become so covered in gunk that they don’t move. You might try cleaning the fan and moving the fan blades by hand to see if that gets it going.
If nothing works, you are likely looking at replacing the fan. The majority are made by Nutone and if you stay with the same brand, you can just slip the new fan into the old bracket without having to replace the bracket.
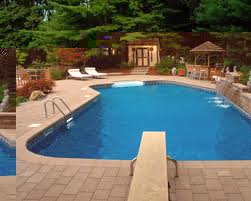 A customer asked her handyman about pool chemicals. Knowing the amount of gallons in a swimming pool is important for keeping the pool's chemicals balanced. For example when shocking the pool (hyper-chlorinating), knowing the number of gallons will tell you how much shock to buy.
Roughly speaking, you can multiply the length x width x depth x 7.5 gallons. This is for a rectangular pool. However, most pools are not a perfect rectangle nor are they a consistent depth. For the depth, you can take the depth in the shallow end, add that figure to the depth in the deep end, and divide that number by 2. This is an average and can vary significantly depending on where the pool's depth actually changes in relation to the length of the pool. Fortunately, you don't have to estimate to the nearest gallon. In fact, for shock, you can estimate to the nearest 10,000 gallons since a bag of shock covers that amount.
Here are some popular pool sizes and their gallons based upon an average depth of 5 feet:
16'x32' - 19,200 Gallons
16'x34' - 20,400 Gallons
16'x36' - 21,600 Gallons
18'x36' - 24,300 Gallons
20'x40' - 30,000 Gallons
24'x44' - 39,600 Gallons
If you are draining and refilling your pool, probably the most accurate way is to simply compare the previous month's water bill to the bill during the month when you refilled the pool. The increase in the gallons of water you used will tell you a close approximation of the gallons in your pool, assuming you were consistent in your water usage for other areas at your house.
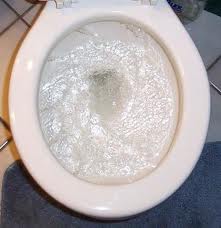 I got an email asking about low water pressure as the toilet was filling. This can happen and it can be easy to fix. If it is the toilet that has low water pressure, in other words it is taking too long to refill, there are a few quick things to do.
First, make sure the angle valve to the toilet is fully opened. Follow the water line from the tank to the valve. Turn the handle counter-clockwise until it stops, and the valve should be fully opened. If that doesn’t work and the rest of the house has good pressure, it may be an issue with the angle stop or supply line itself. Remove the supply line from the fill valve at the bottom of the tank and point it in a bucket. Turn the angle valve back on and see if you have strong pressure.
If the pressure is low, I would replace the angle valve and/or the supply line. If the pressure is strong, I would replace the toilet fill valve. Fill valves fail and replacing it will insure you have a good flow of water if the water pressure is good.
Much of the detective work here involves isolating the problem. Like any solution, you have to get to the root problem in order to solve it.
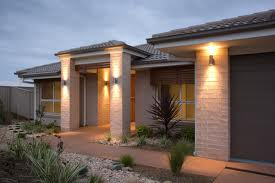 Replacing coach lights is a perfect project for a would-be electrician. In fact, you don't even have to use a ladder if you don't want, but you will need to stand on something solid to reach.
Before you replace the coach lights, you might check out the exterior porch light near your front door. This light fixture is typically a matching style with the coach lights. My point is if you are replacing the coach fixtures with a different color or style, you may want to consider replacing the light at your front door as well.
Removing the old fixture is really easy. First make sure the power is off to the fixture by turning off the power at the main panel.
The lighting fixture will be attached to the wall by two small threaded rods, which will be covered with decorative nuts that you simply unscrew. The base of the lighting fixture will pull off the wall, but there will be wires from the junction box attached to the fixture wires. While you support the light fixture, unscrew the wire nuts that connect the house wires to the fixture wires, then remove the fixture.
The new fixture goes in as easily as the old one came out. Strip about three-eighths of an inch of insulation from the fixture wires. Use yellow wire nuts and connect the fixture wires to the circuit wires. Connect the white circuit wire to the white fixture wire and the black circuit wire to the black fixture wire. Then, attach the green grounding wire to the bare copper ground wire in the box. Carefully tuck the wires into the box and place the lighting fixture over the two threaded rods.
Some fixtures come with a sheet of foam that fits in between the fixture and the wall. The purpose of the foam is to block out the weather. If your fixture has one, slip it in between the wall and the fixture before you connect the wires. The wires will easily thread through the hole in the center of the foam.
Once everything is connected, tighten down the nuts that hold the fixture to the threaded rods and this will compress the foam as you tighten. Doing that will help fill voids in between your wall surface and the fixture base.
Some stucco finishes are very rough, so you may need to lay down a bead of caulking around the perimeter of the fixture's base.
Flip the power back on and enjoy the new look of your home.
 Some cabinet drawers have drawer guides on either side of them. They have one-half of the guide mounted to the drawer and the other half mounted to the inside of the cabinet opening.
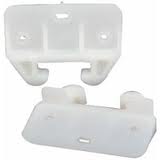
Other drawers have a plastic guide that is stapled to the top rear of the drawer. These can break off or become damaged (they are plastic after all) and need replaced. The fortunate thing though is it that it is easy.
These style of drawers ride on either wood runners or the runners may be covered with plastic for easier gliding. The rear of the drawer rides on a guide down the center of the opening. Remove the plastic guide and take it with you. They are usually color coded and so you can just buy the right color which should be the right size. Match them up just to make sure.
When you get home you can reattach the new plastic guide. If you don’t have a heavy duty stapler, you can use some screws to hold the guide on. Use at least two screws in opposing corners so that the guide won’t move. Once it is attached, place the plastic clip onto the guide and slide the drawer into position.
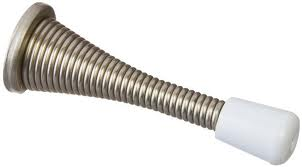 Installing a door stop for an interior hollow core door is very easy, but where should you install it? You have a choice to install it either on the door or on the baseboard of the wall where the door would hit.
The key is to make the area of impact somewhere where the door has the support around the perimeter. Whether or not you install the door stop on the wall or the door, if the point of impact is in the hollow area, you will end up with a hole in your door.
If you choose to install the door stop on the door itself, you can install the door stop either at the bottom corner or top corner on the latch side of the door. You will be able to tell if you hit the wood perimeter if the door stop is hard to screw in (that’s a good thing).
If you choose to install the door stop on the baseboard, make sure the padded end of the stop contacts the edge of the door (where there is wood support), otherwise you get a hole in your door. It also helps to have the door cut correctly so that you don’t have to angle the door stop upwards to contact the door. The door stop will stay in place if the force is absorbed along the entire length of the stop. If it is at an angle, the force may push it out of the baseboard.
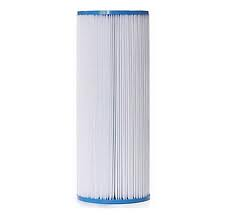 Yes, sometimes a handyman gets asked to look at pools too. This time the pool pressure was much higher than normal and the pool motor seemed to be straining. This warranted checking the pool filter cartridges. When I pulled the cover off of the tank, the filters didn’t seem very dirty nor did they appear to be clogged. They did appear to be “glittery”.
As soon as I lifted the filter cartridges out, I could tell a difference. Not only were they heavier than normal, but the pleats felt like sandpaper. These cartridges had calcium built up on them and were preventing a good flow of water.
I bought some cartridge cleaner and placed the cartridges in a clean plastic garbage can. I filled the can up to the top of the cartridges and added the cleaner…and waited. The next morning I removed the cartridges and hosed them off. They were smooth again and normal in weight.
After I reinstalled them, the pressure came back down to normal. Had the cartridge cleaner not worked, I probably would have had to replace the cartridges. By the way, I also drained the pool as the calcium had settled on the plaster as well.
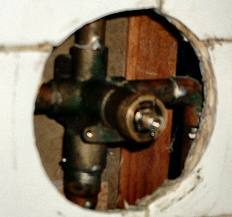 If you have a single handle shower valve, have you ever pulled it out to start the water and noticed the entire valve moves with it? A lot of home inspectors pick this up during an inspection. It can certainly make a buyer apprehensive.
It probably stems from the fact that the piping and/or valve wasn’t strapped to the wall framing. The straps hold everything in place and so when you pull the knob, the valve stays in place. But what if the valve was never strapped in place?
The obvious answer is to open the wall and strap it. Of course then you have the burden of repairing the wall. You might be able to cut the wall open at the back side and repair drywall instead, or even install an access door. If you are lucky, the back of the wall is in a closet or some other inconspicuous place.
Aside from strapping the valve and piping, keep your fingers crossed. You can do a couple of things that might (and I emphasize “might”) minimize the movement of the valve. The first thing is to replace the cartridge with a new one. Old cartridges can get a little sticky, and installing a new cartridge will make the handle easy to move and put less stress on the valve. So this should minimize the movement. Additionally, you can try to squirt some expanding foam into the cavity around the valve. You will need to remove the escutcheon spray the foam in, an let it firm up. You may get lucky and it might work.