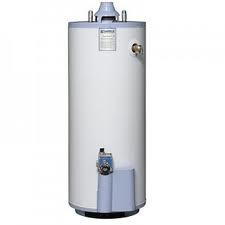
 Replacing a water heater is really a series of steps that ultimately lead to you taking a hot shower. When you remove a water heater, you drain it and install a new tank (assuming you are using a tank-style storage heater). That tank is full of air and you need to bleed the air out of the system.
Once the new water heater is connected to the piping, you turn the water back on and start refilling it. The air in the tank now gets displaced by the water filling it. So as the water enters the tank, it pushes out the air. The air has to go somewhere, so you need to open a hot water fixture close to the tank so the air can exit the system. You will hear the air hissing as it comes out of the faucet. When water finally starts coming out of the faucet, the tank is full of water and you can shut off the faucet. Now, this doesn’t mean that there is no air still left in the system. You will likely get a few burps of air when you open different faucets within the house. Once all the air is purged, you won’t get the burping anymore.
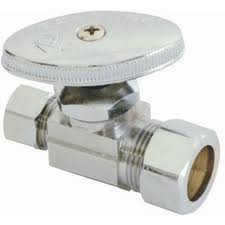 You might find yourself needing to work on your plumbing sometime, specifically replacing an angle stop. If your angle stop is dripping, you can try to slightly tighten the nut right under the handle but if that doesn’t work, you are likely looking at replacing it.
You will need to turn off the water to the house. Some angle stops have a water supply line connected to them (like a toilet angle valve), but most are separate from the supply line. You have to be prepared to drain the water from the line when you start removing it. It’s easier if you just point the supply line into a bucket, but be prepared for water to come out once you start working on it.
The easiest replacement is on a bare copper pipe. Use two wrenches and hold the nut with one and the valve with the other. Start unscrewing it and it will come out easily. I generally just push the new valve on the pipe without replacing the ferrule or nut. The nut will squeeze the ferrule into any voids and close off the leaks. Again use two wrenches, one to orient the valve and the other to tighten the nut that holds it in place.
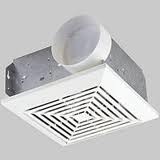 When a toilet (or rather bathroom) exhaust fan stops working, things can get downright musty in there. Not only does an exhaust fan ventilate smells, but also moisture from a shower or bath. Fortunately, it shouldn’t be too hard to figure out.
Before you grab a ladder, check to see if a GFCI outlet has tripped. You can press the “reset” button on the offending outlet to restore power and get the fan running again. You can also check the breaker, but you would see more electrical issues than just a bathroom.
If everything checks out, get the ladder and pull down the grill. They will unhook from the box in the ceiling. The fan plugs into an outlet in the box. You can unplug it and plug in a tester and then turn on the switch. If the tester lights up, it is time to replace the fan. If the tester does not light up, then you are not getting power to the fan and therefore you have an electrical issue to figure out. To verify the fan does work, if you want you can plug an extension cord into an outlet that you have verified is working, and then plug the fan into the other end of the cord.
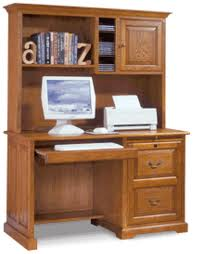 A typical handyman repair is fixing drawers. Another common job is the repair of a pullout computer keyboard. Have you ever noticed that drawers and keyboard trays operate in the same way? Repairing each is very similar.
The interesting thing with computer trays is that people tend to place the weight of their hands and arms on them as they type. This leads to quite a bit of stress where the keyboard attaches to the drawer guides. You might see that there is damage in these areas.
Pull the tray out and examine these areas. Look at both the tray and the cabinet where the mating half is located. Look for looseness or slop in these areas. You might need to remove the guide and glue any splits in the wood tray. Use wood glue and clamp the split closed and let it dry for 24 hours. Then you can reinstall the guide.
For the mating half (it may be in a cabinet or the underside of a desk) you may need to remove it and add some toothpicks or golf tees to firm up the holes. For golf tees predrill the hole and then reinstall the screws. A loose tray will tighten up nicely with these repairs.
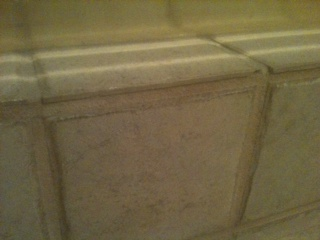 If you are going to install ceramic tile on a counter or shower surround, it makes for a nice finished look to get finished round over or bullnose tiles (for kitchens they are referred to as V-cap tiles). Some styles of tile do not have these and so you may be faced with the chore of making them look good at an end point.
For a shower surround you can use a border tile. This would be a tile that would complement the field tiles, but does have a round over finish. The other option is to apply grout at a 45-degree angle between the wall and the top edge of the tile. This essentially covers up the unfinished edge.
For a corner on a countertop or shower pan where you have a flat surface going over to a vertical surface you are faced with a different problem. Without a rounded finished edge, you will need to get creative. Imagine the unfinished edge staring back at you. That would be pretty ugly and certainly the sign of a novice. What you can do is grind off the unfinished edge at a slight angle so that when it comes time to grout the area, you can simply fill the void with grout. Grind the area from the top finished edge of the tile (don’t touch the finished edge) and remove a small amount of the tile under it. The grout will match all the other grouted areas and will look nice.
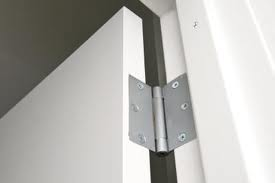 Door hinges last for a long time and usually don’t need to be replaced. However, some folks like to change them out for a new color or finish when updating a room. Occasionally, the hinges will be so covered in layers of paint, it will be hard to see not only the outline of the hinges, but the screw heads as well.
You can probably guesstimate where the screw heads will be. I usually take a screwdriver and press down and the screwdriver finds the head. I guess it depends on whether or not you are keeping the hinges or replacing them. You could use a razor or even a standard screwdriver and scrape off some paint around where you think the screw heads will be.
If you are keeping the hinges, you have a headache of removing all the paint on them. In some cases, the paint will peel off easily but it is tough to get all of it out. I suppose you could use fine steel wool to remove the last traces of paint, but really, just go get some new ones and save yourself he trouble and time of removing decades-old paint.
Replace one hinge at a time so that you don’t have to remove the door, which would also add time and headaches. If you are painting the door, obviously paint it first, and then replace the hinges.
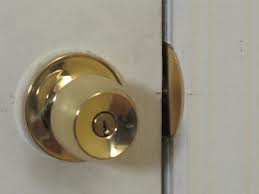 If you have an exterior door that requires a shoulder to force it to latch, you may want to spend a little time to fix it. It likely is a simple fix.
There are many possibilities why a door won’t latch starting with the latch itself. Make sure the latch is aligned with the hole in the strike plate. If it is not, has the door sagged? Hold the door knob in your hands and try to lift it up. If there is movement, you need to correct it. You can use long deck screws in place of the hinge screws on the jamb side of the top hinge. If the door is firm, you can either move the strike plate up or down, or even file away a little of the strike plate to allow it to receive the latch.
If the latch contacts the strike plate but it tough to get in the last ½”, the weatherstrip may be to blame. Something is obstructing the closing of the door, and it is often the weather strip around the perimeter of the door. It may be that the wrong type was used, or that it wasn’t installed correctly, but that is a good place to start. Check both the hinge side and the latch side for problems.
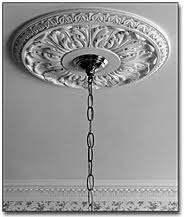 If you’ve ever encountered a drywall problem while replacing a light fixture, a ceiling medallion might just be your answer.
On occasion, if you remove a ceiling fixture that has a large base and are installing a light fixture with a smaller base, you may run into trouble. At the very least, the paint likely won’t go all the way to the junction box, and it may be that the drywall will have a gap that you might see. A ceiling medallion can solve both of these problems.
The medallion will get secured to the ceiling before you install the new light fixture. They are made of different materials and can be caulked into place, screwed to the ceiling and then float over the holes. Some are made of plastic and some are plaster. They can be painted whatever color you choose. You can buy them in ornate styles or very plain styles depending upon the décor of the house. If you are going to paint it, you might paint before you get it on the ceiling and then do any touchups afterward.
Once the medallion is secured to the ceiling, you can install the light fixture like normal although you will likely have to modify the opening on the medallion to expose the box and connections.
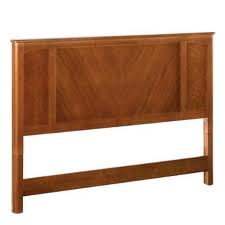 Attaching a head board to a bed frame is a fairly straightforward handyman job. Realize that most beds come with a head board that attaches to a frame, you may find one you want to install. Lots of people make a headboard out of a door or a frame and fabric, but then need to secure them to the frame.
For the most part, bed frames are metal and will have holes at the end for securing a headboard. Head boards typically have legs on them and the legs get bolted to the frame. Not true with all head boards of course, but the vast majority do have legs. If yours doesn’t have legs, you will either need to add legs (to raise it high enough to be seen, as in the case of a door), or you can just bolt it on as well (some head boards made of doors are just hung on the wall at the proper height).
However you headboard is designed, hold it up to the bed frame. It’s a good idea to clamp it in place so that it doesn’t move as you work. Use a pencil and mark the hole pattern and locations on the legs or headboard. Drill out the holes (you might choose to remove the headboard first) and then get the appropriate sized bolts, washers, and nuts. Tighten everything up until snug and then go enjoy a nap.
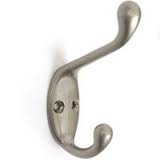 Installing a coat hook on a door is a pretty basic job. With a coat hook, people can really load them up with lots of coats and the weight can pull them out of a door, particularly a hollow core door. Coat hooks are great for the back of a bathroom door where you can hang a bathrobe on them.
The danger of hanging a hook on the back of a hollow core door is that there really isn’t much support there and you risk the hook pulling out and damaging the door. You can try hollow wall anchors, but there are no guarantees here.
For solid doors, you can find the center of the door and predrill holes for the screws. Obviously you want to use screws that are short enough so they won’t penetrate the other side of the door, but large enough so that they will support weight.
For wall installations, it’s the same deal. Ideally you want to find the wall studs and use screws that will penetrate them by ¾”. If you want a location that doesn’t have a stud directly behind it, use hollow wall anchors or molly bolts. You want to be able to hang things on the hook, but you don’t want to pull the hook out of the surface.