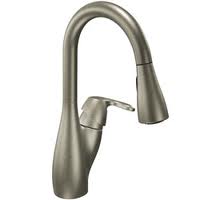
 A kitchen faucet with a pull out spout is a wonderful feature. You don’t have the space taken up with a separate sprayer on the side, so these types of faucets can be mounted through a single hole which gives a very clean finish. The pull out spout is connected to a hose which is typically a beefy hose. It is braided or metal and is heavier than a vinyl hose. When you pull the spout out of the faucet, it should retract back into the faucet when you are done with it. Sometimes they don’t.
The hose attaches to both the spout and the body of the faucet, and its job is to simply transport water. The hose loops down into the sink cabinet and back up to the faucet body. There should be a small weight attached to the hose to help pull the hose back down once you release the spout.
Make sure that the hose isn’t tangled up in the drain piping…you don’t want it weaving in and out of the pipes obviously. Make sure the hose has a weight on the side of the loop that connects to the spout. If the weight is on the rear side of the loop, it will not help the hose retract. The weight is usually held on with a few screws that sandwich the hose in the middle.
 Plenty of floods come from a toilet. Whether it is an overflow or a pressurized water leak, there are ways to prevent them.
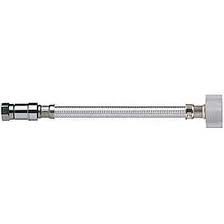
One upgrade for a toilet supply line involves replacing the supply line and angle valve if necessary. Sometimes these are one piece and so you have to replace both. You can buy much higher quality supply lines that will put your mind at ease over the builder-grade metal lines.
As an upgrade, you can buy plastic lines or even steel-braided no-burst lines (these usually carry a long guarantee). You can also buy flood safe lines that have a mechanism that stops the flow of water even if you sever the line. It’s pretty slick.
They all install the same way. Turn off the water and unscrew the hose fittings and remove the hose from the toilet tank and angle valve. The new supply lines simply screw back into the place of the old ones.
For the flood safe hose, the flood safe mechanism is connected to the water supply valve and then the braided steel hose is connected to the toilet tank. If the flood safe mechanism senses a water flow greater that the factory preset, then the water flow is stopped since it thinks a flood is occurring. The mechanism can be reset by turning the water off and removing the flood safe from the angle valve. This will reset it to allow the flow of water. Then just reconnect it back to the valve and slowly turn the water back on.
 Here is an easy handyman job for any beginner. Assuming you aren’t afraid of heights, sure you could climb a ladder to reach the bulbs. But what if the bulbs are crazy high?
I guess it really depends on where the bulbs are located in relation to the walls. Lots of people have extension ladders that they can lean against the wall and climb up to access the bulb…assuming it is very close to the ladder. If the bulbs is too far from the walls, you can certainly rent an “A” frame ladder, but they you have the chore of transporting it to your house. This isn’t an easy task for ceilings that are 20 feet high.
The best and safest option is to use a telescoping pole with a suction cup on the end. You can buy a small suction cup and screw it onto the end of any pole that has the same mating end. The telescoping poles are great for really high ceilings. The suction cup will have a string that hangs down so that you can break the suction. Make sure the cup is clean (which will make it somewhat tacky) and stick it to the bottom of the bulb. Turn the pole to unscrew the bulb and gently lower the bulb. Remove it and stick on a new bulb and reverse the process. Once you have the new bulb snug into its place, pull the string and you can move to the next bulb. You can buy an assortment of screw-on tools for removing different types of bulbs. You just need to choose the one that will work with your style of bulb.
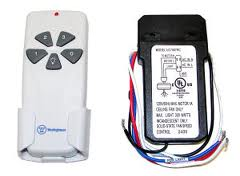 A ceiling fan remote is a great thing to have, even though it causes a lot of confusion. Although it is convenient, people ask if they can, or should use both to control the fan.
For the most part, a remote switch is used when there is only one power supply coming into the fan. In other words you don’t have separate switches to independently operate the fan and the light kit. The remote makes this possible. The remote switch is connected inside the ceiling junction box and is controlled with a hand held or wall mounted unit, and allows you to turn the fan and light on-or-off at your will. If you don’t have a remove and don’t have separate switches, you will have to use the pull chains hanging down from the fan.
The confusion comes with using the remote and the pull chain. Don’t use the pull chain if you are using a remote. In many cases, a customer will call saying that the remote doesn’t work anymore and they even replaced the batteries. The problem is usually that someone pulled the chain and turned off the fan. The pull chains usually have graduated speeds: low, medium, high, and off. You want the pull chain to be on it’s maximum setting, and then use the remote. The only problem is when someone pulls the chain which will move the setting from maximum to off…then the remote won’t work.
 Chair rail molding has an elegant look to it. It’s not something you see in every house, but when done right, can really set apart a room from the others. If you are installing chair rail in, for example, a bedroom, you can nail it to the walls and stop at the door casing. In that way you have a clear beginning and end point. But what if you don’t have a clear beginning and end point? The answer is that you can make a return for that point.
A return is an attractive way to begin or end molding. The final appearance is that the molding’s profile carries all the way to the wall. Imagine cutting the molding and what you are left with is an ugly straight cut. With a return you don’t see the flat cut.
A return is done by making miter cuts. On the long piece of molding is a 45-degree miter cut from the wall to the outside of the molding. This will leave you with a pie shaped piece that needs to be installed.
This gets tricky and it is dangerous. Don’t be foolish and risk injury by placing your fingers next to a spinning blade. Use hold downs to keep your fingers out of the way. I generally take a long piece of molding and first cut the mating 45-degree miter in it, then cut that piece off.
Once you have the mating piece, I usually glue it in place and hold it there until the glue dries with some painters tape. If you try to nail it, it may split.
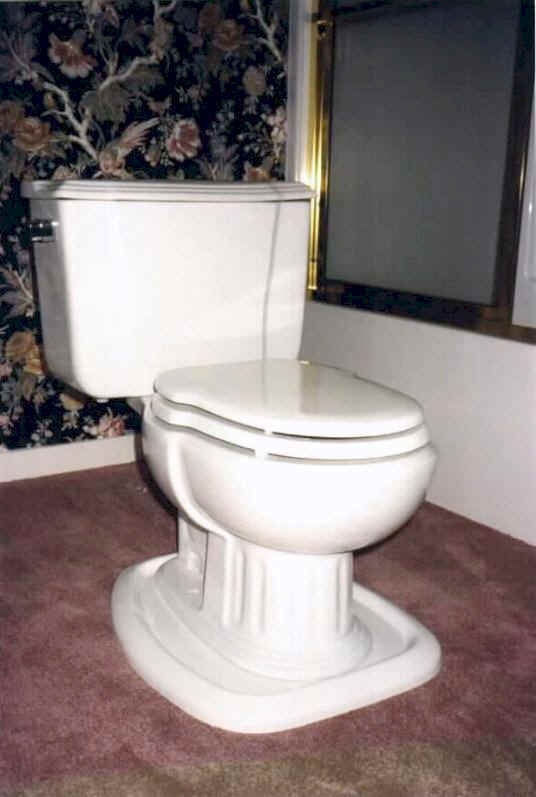 If you have ever replaced a toilet with a smaller toilet, you may have some challenges. Particularly if your new toilet has a smaller footprint. That is to say that the toilet you are installing doesn’t cover the area that your old toilet covered. If you’ve ever removed an old toilet, you know that the area under it can be mighty unsightly.
There is a decorative floor plate that you can install to make up this gap. In my opinion, they are not pretty, but they are functional. If your options are replacing the floor or installing a cover, the cover all of a sudden doesn’t seem so bad.
There are covers that allow you to install them without removing the toilet, but many require that you do. It really isn’t any different that installing a new toilet with a small step thrown it.
Once you have the old toilet removed, you can add adhesive caulking to the flange and push on the cover plate and attach it to the floor. Install a wax ring (get the type with the rubber throat built into it) and then install the new toilet like normal.
Once you are finished, the base of the toilet will look somewhat out of proportion to the new smaller toilet, but it is cheaper than replacing the floor.
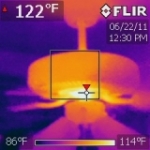 We’ve all heard that that ceiling fans make a room feel cooler in the summertime. For those of us in the desert, in most houses during the summer, ceiling fans are used every day. It’s not that the fan cools the air, but rather makes you feel cooler with the wind chill effect. Did you also realize that a ceiling fan is a 100% efficient heater?
In order to move the fan’s blades an electric motor is used to turn the blades that move the air. This motor has a byproduct: heat. You can see from the picture that ceiling fans can run hot. This heat is created and distributed in the room. How much of a difference does that amount of heat make? I don’t know, but I would guess it is worth continuing to run the fan as it makes the room “feel” cooler by several degrees, and I don’t think the amount of heat produced would be enough to offset that cooling effect.
So what should you do knowing that a ceiling fan creates heat as it operates? I will continue to run my ceiling fan and not worry about it. The ceiling fan does a great job of helping a room’s occupants to feel cooler, even though in reality it creates a small amount of heat in the process.
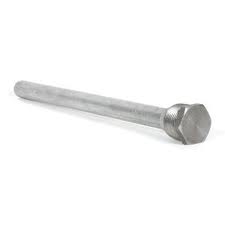 A water heater anode rod sits inside the water heater where it contacts the water. They will be located at the top of the tank (where they can be serviced).
To find the location takes a little sleuthing. You will need to get access to the top of the water heater, which for some people might mean removing any extra insulation you have added. You might see a large nut at the top of the tank. You will need a deep socket ratchet to remove it, and it’s going to take some elbow grease.
Realize that the job of the anode rod is to sacrifice itself, so over time it erodes into nothing. So, you might remove the nut expecting to pull out a beautiful rod but all you see is a little piece of wire or a nub and think that it isn’t the anode rod. It was the anode rod and your timing to replace it couldn’t be better.
You might have to do some digging too. It may be under a plastic disc, or under fiberglass. It may even be under the cover of the tank, which will require you to remove the top cover to expose it. Finally, you may have a combination nipple/anode rod where the outgoing nipple has the anode rod attached to the bottom of it.
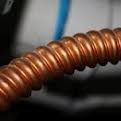 Flexible copper plumbing lines are a fantastic option to using straight copper piping. They are fast and you can save money because you don’t have to buy separate fittings, elbows, and straight lengths of pipe. Rather you buy a flexible line and gradually arc it to where you need it to go.
You can buy flexible lines as a sweat fitting, meaning you have to use a torch and solder it on, or you can buy them with a female thread. You can also get them with compression fittings to mate with a bare copper pipe.
The time savings come in because you have fewer connections to make. Rather than sweating multiple fittings and lengths of straight pipe together, you can connect both ends of the flexible pipe to their destinations.
You want to be careful not to bend the pipe to the point where it restricts any water flow. So gradual arcing of the pipe is very important to maintain good water flow. If you bend the pipe too much you will see that it will start to become out-of-round and the volume of the pipe (it’s inside diameter) will decrease. It sometimes helps to get a longer flex line in this case as you will have more room to make the connection.
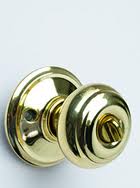 A loose door knob is an easy repair right? It really only takes a minute and a screwdriver and it is tight again and working normally. But what if you can't see the screws?
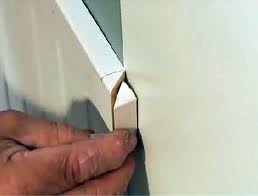
Some people get a little confused though when they can’t find the screws. The screws hold the two halves of the handle together. They mount on either side of the door and sandwich the latch mechanism between them. Turn the handle and it operates the latch.
Over time though the handle will get loose and it’s time to tighten the screws that hold the two halves together. The screws will always be on the interior side of the door. If they are not visible, look to where the handle meets the door. This will be a decorative cover that hides the screw heads. You should be able to pry off the cover with a screwdriver. You might notice that the cover will have a small cut-out in it. This is so you can rotate the cover and expose the screw heads. The cut-out will allow you to insert a screwdriver and tighten the screws (there will be two). When the handle is tight again, rotate the cover back and snap it back down.