Would You Like a Free Expert Consultation?

Las Vegas Handyman 

Not every project goes as well as planned. We would be happy to spend a few minutes answering your questions.

Subscribe by Email

Your email:

Browse by Tag

Pro Handyman Blog

Current Articles | RSS Feed RSS Feed

Plumbing :Sink Stopper That Doesn’t Stop Water


sink stopperHow many times have you cursed your plumbing? Many times I would expect. One of those times might deal with the sink stopper. When you pull up on the sink stopper handle to engage the stopper and it doesn’t stop the water. Instead, the handle just drops back down and the stopper lifts back up so that the water just runs down the drain.

You are probably thinking that this is going to kill your weekend, but the reality is that it should take just a few seconds and likely the most difficult part will be getting access under the sink.

A sink stopper works like this: the sink stopper is connected to a pivot rod. This pivot rod has a ball on the end of it allowing it to move up and down. This up and down movement lifts and lowers the stopper. The other end of the pivot rod is connected to the handle. So when you lift the handle, the pivot rod pushes the stopper down closing off the drain. When you push the handle back down, the pivot rod lifts the stopper and allows the water to drain.

The problem is where the pivot rod ball attaches to the drain pipe. The pivot rod is held to this pipe by a cap nut. All you have to do is tighten this cap nut. If you over tighten it, the sink stopper won’t move freely, so tighten it to the point that the sink stopper will move but not so much that the stopper won’t stay in place.

Handyman: Range Hood Exhaust Filter


range hood filter

If your kitchen range hood makes a loud noise when you turn it on, you may want to play handyman and snoop around. True, it may be a motor that is going to die, or it may be something that has come loose in the cabinet. It also may be a clogged filter.

Range hoods come with a filter to try to minimize smells associated with cooking, particularly range hoods that recirculate air back into the room. The motor may be suffering from lack of air. As the motor pulls air from below, the air filter is so clogged that no air gets to the motor and so the motor tends to bow the filter towards it. If you remove the clogged air filter and turn the motor on, you will see what I mean…it should run much smoother.

Some quality range hoods have a filter that you can throw in the dishwasher and clean. The builder-grade units have a disposable filter with a series of layers designed to filter the air. These tend to get so caked up with grease that they stop any movement of air from getting to the motor. I suppose it could be said that they are doing their job, but that the homeowner should have replaced it a long time ago.

You can get replacements from a home center, although for add sizes, you may have to visit an appliance dealer. They just slide out and back in again.

Tags: 

Reconnect A Soft Water Plumbing Loop


soft water loopWith all of the vacant properties out there, there is vandalism and theft on a daily basis, many of which are plumbing associated. Vandals will break into a vacant home and steal a variety of items. A popular item to take is the water softener. This is located in the garage and is a quick cut and throw it in the back of a truck. These units are four-to-five hundred dollars new, and the thieves can sell them for profit quickly.

Generally, they cut the copper piping behind the softener. In order to turn the water back on, this pipe (called the loop) needs to be reconnected so that water will flow into the house, and not all over the garage floor.

Depending on how the softener was removed, it may be a quick job or not. If the bare copper piping is sticking out of the wall, you can either sweat a new copper fitting or flex line onto each side, or even use a stainless steel hose with compression fittings on each end. If you are comfortable with a torch, here is an article on how to sweat copper piping.

For the compression fittings, you will place a nut over the pipe, slide the ferrule over the pipe, then place the mating hose onto the pipe and tighten it all up so that the ferrule compresses to seal out any leaks.

If you have remnants of copper flex lines still attached to the bare copper pipes exiting the wall, you will need to heat up the ends of the flex lines until the solder melts and remove them.

Tags: 

Should I Prime Before Painting?


paintingPriming before painting can be looked upon in a couple of different ways. Priming the walls lays down a nice base in which to paint your final color. It can cover dark colors, stains, dirt and whatnot so that your paint shows it’s color nicely. The color should be very consistent and predictable.

The downside is that it is also a pain to paint the same surface twice (or more), and it adds to the cost of the job both in dollars and time. A good quality primer will cost more than paint, particularly if you are buying paint in 5 gallon buckets.

There are products that have primer and paint mixed in so that you theoretically don’t have to paint several coats, but these are fairly expensive. From a cost perspective, it would be cheaper to use multiple coats of paint than a primer and paint all-in-one product, but it should save you some time.

If you choose not to prime before painting, you may end up painting several coats of paint anyway, as the first coat will act as a primer, but it will be harder to delineate where one swath of the roller left off and where the other should begin. Painting on top of a white primer base is pretty obvious.

For a more predictable, consistent finished product, priming before painting is the way to go. However, if you are looking to save a little money, you could try foregoing the priming.

Tags: 

Does Your Light Switch Buzz Or Humm?


light switchIf your light switch makes noise...that's not good. If it makes noise, it likely is a buzzing or humming noise. There are a couple of possible reasons for this,and it the problem needs to be fixed immediately.

For the most part, light switches are cheap. Except for the contact terminals, light switches are made of plastic and they can break easily if someone slams their hand against it, but that likely is not causing the buzzing noise.

The buzzing or humming noise usually comes from where a wire connects to a terminal.

It may be that the terminal is damaged or corroded, but you will find that there is a loose or bad connection here. If there is corrosion, resistance can even make the switch warm to the touch. A loose connection causes heat and can obviously lead to bigger problems.

The solution is to replace the light switch. Also, if any of the ends of the copper wires are dirty or have corrosion on them, you can clean them up with some sandpaper. Turn the power off before you start working on the switch.

Here is some information on how to replace a light switch. Make sure that when you re-install the light switch the wires are snug in the terminals to avoid problems.

Tags: 

Loose Cabinet Drawer Repair


cabinet drawer repairHow many times have you pulled out the kitchen drawer and it flops down into your hand. Chances are good that the guide has broken. Drawers are installed in a variety of ways, put when it flops down it usually indicates that the rear guide has broken in some manner. Drawer guides have either guides on either side of them or a plastic guide attached to the rear of the drawer.

If the drawer flops down, it is likely that the plastic guide at the rear of the drawer has broken, since if one of the 2 guides mounted on the sides should still keep it relatively in place.

Pull the drawer out of the cabinet and inspect the guide. They ride in a groove at the top of the cabinet’s opening and will either break off or just come loose from the back of the drawer. They are usually stapled to the top rear of the drawer, so it may just have come loose and fallen off. You can re-staple it and put the drawer back in.

If you need a new guide, most home centers carry a good variety. Bring the old guide with you and match it up. Some guides are even coded by color. Re-secure it back on the drawer and install it into the cabinet.

Tags: 

Handyman: Reverse Refrigerator Door


refrigerator
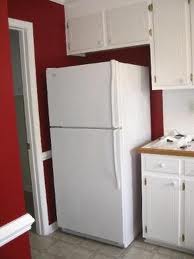
If you are tired of banging your cabinets up every time you open the refrigerator door, then get ready to spend an hour, or call your handyman, to forever rid yourself of that headache. You can reverse the swing of your refrigerator’s door so that the hinges are mounted on the opposite side than they currently are. This fix is good for units that have a top and bottom configuration, for example, the freezer is on top and the refrigerator is on the bottom.

Your refrigerator is made so that you can move the handles and hinges from one side to the other with minimal effort. Each door is held in place with brackets on top and bottom, and you’ll also notice symmetrical holes on each side. These holes fit the pattern of the brackets that hold the hinges and the handle. Whichever side doesn’t have the hardware screwed into it will have the plastic caps to cover the holes.

Before you start working, unplug the refrigerator to avoid getting shocked. Obviously, you must work fast to keep the food cold. Remove the food from the doors and place all edibles inside the compartments to preserve them, as well as to remove the weight from the door shelves while the doors themselves are loose.

You can remove the plastic caps with a standard screwdriver wrapped in masking tape (to avoid scratching the fridge). Hand on to them as you will insert them over the holes where the handles and hinges are currently.

Realize, too, that different refrigerators have different configurations and that some additional steps may be necessary, such as removing a drawer attached to the door.

Start with either door and remove the handle first. The handle may be attached just to the front of the door, or more likely it will be wrapped and secured to the top and bottom edges of the door. You will be able to remove the fasteners with a screwdriver, allen wrench, or hex-head driver. Now, transfer the decorative caps to the opposite side of the refrigerator to plug the new holes.

For the hinges, the bottom hinge will bear the brunt of the weight of the door, so start by removing the top hinge. Remove the screws that hold the hinge on and then you can lift the door off the post of the bottom hinge. On some doors, you may have to rotate the door 180-degrees and remove some trim pieces.

To reinstall the door, simply secure the bottom hinge into the holes that were previously covered by the caps. Once the bottom hinge is set, you can place the door onto the post of the bottom hinge. Straighten out the door and then secure the top hinge to both the door and the fridge. After that, just screw the handle back on the plug it back in.

Tags: 

Plumbing Repair: Fix A Leaking Angle Valve


plumbing repairA leaking angle valve is a pretty common plumbing repair. These valves are located under a toilet or sink and rarely get touched, unless you need to service the fixture that they are supplying water to. When the time comes to turn them off, they tend to leak…and not stop.

In the event this happens to you, there are a couple of tricks you can try. First try to turn the packing nut slightly. This is a nut located right underneath the handle. Turn it clockwise and with any luck, the leak will stop. If it doesn’t, go to plan B.

Before you replace the valve, try turning off the water to the entire house. Remove the handle and packing nut and you will see the valve stem. Remove the valve stem and you will see the washers. Try to clean the stem and washers and get the washers pliable, as you might find some nasty deposits on them. Put everything back in place and turn the water back on. With any luck, you will have water flowing to the fixture and no water leaking from the angle valve.

If you still have a leak, you will need to replace the angle valve.

Choosing The Right Size Landscape Lighting Transformer


landscape lightingIf you are planning on installing a landscape lighting system you better be ready to do some math. You see, it’s not just about plugging in the system and you have light. No, you need to do some calculations and planning first. The biggest consideration is how large of a transformer you need to buy. You can figure this out by doing some quick math.

I would recommend drawing a road map of where you want lights and what wattage each bulb will be. This is critical, because if you exceed 80% of the transformers capacity you will have problems. So, once you have a list of the fixtures and their bulb wattages, add the watts up so that you come up with a number. That number shouldn’t exceed the 80% rule for the transformer. For example, if you add up the watts of all the light bulbs on your planned system and it comes up to 290 watts and your transformer is rated for 300 watts, you better either upgrade your transformer or decrease the bulb wattage or number of fixtures on your system. A 300 watt transformer should be able to handle 260 watts (300 x 80% = 260).

If it is possible you might want to add fixtures in the future, you are better off buying a larger transformer now, rather than buying two 300 watt transformers later. A larger transformer is cheaper that buying 2 separate transformers.

The pre-packaged landscape light systems you can buy at a home center are good to install right out of the package as they have already considered the 80% rule. Just don’t increase the wattage of the bulbs without doing the calculations.

Sprinkler Repair Trick For Leaking Valve


sprinkler repairIf you lift up the cover to your sprinkler valves and they are covered with water you likely have a leak at a sprinkler valve, or maybe a fitting. If this sprinkler repair is at the sprinkler valve, it typically will be in the top of the valve. This is where the mechanics of the valve are. The bottom of the valve is just a housing, but the top contains the diaphragm, solenoid, wiring and screws.

If you can isolate which valve is the problem, rather than replacing the entire valve, buy a exact replacement for that valve and just replace the top half of it. This will save lots of gluing and problems due to the cramped area you are working in. The valves are usually placed so close together that you can’t replace one without disturbing the others. So by just replacing the top of the valve, you are basically getting a new valve (at least the mechanics) without the hassle of actually digging and cutting.

Make sure after you replace to top half that you tighten all of the screws to the same torque. In many cases, it will create a pressure imbalance that will prohibit the diaphragm from sealing and stopping the flow of water.

All Posts