 A Las Vegas handyman should be knowledgeable in various areas. As the weather gets warmer, homeowners will start checking out their sprinklers. You should have a sprinkler box surrounding your sprinkler valves.
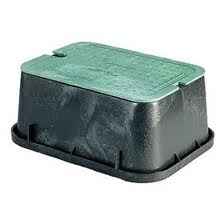
Installing a sprinkler box is much easier than installing sprinkler valves. The box fits around the valves and has a removable top. Remove the top and dig out the hole large enough so that the box will fit. You want the top of the box deep enough so that the lawnmower won’t hit it, yet you will still be able to service the valves without too much trouble. I have found that cutting out a portion of the bottom ends of the box makes things go much easier.
The trick is to place the box into the hole and eyeball where the pipes are in relation to the box. You will cut the bottom ends of the box to allow the box to fit over the piping and rest on the ground below. I use a jigsaw and the job goes very quickly. It doesn’t have to be pretty. The jigsaw will quickly cut the plastic sides out to your specs. You may have to make a few cuts to get the box to fit over the piping yet sit level. Once the box fits well, you can back fill the area around the box and push the cover on.
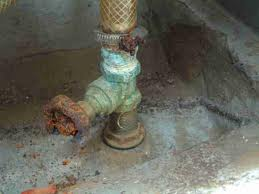 Plumbing valves get old. When they get old, they tend not to want to operate like they once did. If I see an old crusty valve, rather than turn it off, I will shut off the entire house to avoid that old valve.
If plumbing valves are used regularly I doubt they would fail as often as they do. Gate valves are notorious for this. They sit in water their entire lives and 10 years later when you need to shut off the water to whatever plumbing fixture you are working on, the valve's gate shears off from the shaft. If this valve breaks, the gate may stay up and allow water to pass. At this point you will have to shut off the water to the house to service the plumbing fixture, which will probably cause the gate to fall into place and stop the water.
Your choices to get the water flowing to the fixture again are limited. Once you turn the water back on the house, since the gate is in the down positon, the water will not flow to the fixture. You might be able to remove the top of the valve and manually remove the broken gate. This will allow the water to flow again, but the valve will be useless...you will only be able to control the water to the fixture by turning on or off the main shutoff.
Ball valves don't fail nearly as often as gate valves since the shut-off mechanism is directly controlled by the lever. If the lever is parallel to the pipe, the valve is open and will allow water to pass. If the lever is perpendicular to the pipe, then the water will remain off.
If you are considering shutting off an old plumbing valve, you might consider turning off the main water supply to the house if the job will be reasonably fast.
 As a Las Vegas handyman, I haul things around in the back of a truck all the time. Tooling down the freeway with items in the back of the truck can get dangerous, so you must take precautions that whatever you are hauling is secure.
We’ve all seen pickup trucks driving down the road with items stacked in the back that are twice as tall as the truck. I steer clear of these folks. You can see the rope they have used is straining and it looks like even a gradual turn will make it topple over.
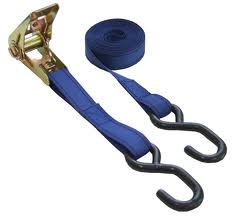
You can use a ratcheting tie down system that will cinch the load down securely. Many trucks have special channels that you can use as tie down points along the bed. If you have a lot of loose items, you might consider a cargo net. This will keep anything from blowing out of the bed as you tool down the road.
For lumber and such, using a standard pickup truck will make it so that the edges are leaning out of the rear of the truck. Sure, you can buy expensive systems that allow you to lower the tailgate and roll it out, but for people on a tight budget, I think ratcheting tie downs are the way to go.
If you don’t have tie-off points on the truck, you can buy anchors that fit into the holes in the rim of the truck bed. Place them and screw them down so the rubber compresses and holds it in place. Then you can use the hooks on the tie-downs, wrap the straps around the lumber and ratchet it until tight. The tie downs aren’t intended to lift weight, but they are great at holding things in place during transport.
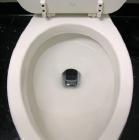 We are a North Las Vegas handyman service doing a variety of repairs throughout the Las Vegas valley. The other day a customer was having a problem with a toilet that continuously ran empty. He would flush the toilet and everything would operate normally. When he returned several hours later, the bowl would have no water in it. He figured he had a leak and started to replace parts in the tank.
Replacing toilet tank parts, such as the fill valve and flapper, are fine but that won’t help the problem of the toilet bowl running dry. Toilet tank parts have to do with the water in the tank, either starting or stopping the flow of water or refilling the tank. Changing the tank parts won’t have any bearing on the bowl holding water.
Although there are instances of a blocked vent actually siphoning water from the toilet bowl, in this case the toilet bowl actually had a crack in the bottom of it. Once the customer flushed the toilet and it stopped refilling, everything seemed normal. Slowly the water would drain out of the crack and into the drain…it didn’t even leak on the floor as the crack was right over the drain. The fix here was to replace the toilet bowl. We were able to line up the bolt pattern and re-use the tank on top of the new bowl.
 Plumbing Leaks can sometimes be fixed with common sense. Plumbing valves often need to be replaced, but occasionally you can tighten some parts and get it to quit leaking. Here are some ideas to try before you end up replacing the valve.
In the case of a hose bib, such as for a washing machine or a hose faucet, try to tighten the cap ¼ turn. This might work and your problems are over. If this doesn’t work, remove the cap and add some packing to the assembly. Packing looks like a thick piece of dental floss. It is made of various materials for different applications but generally it is made of Teflon and can be wrapped around whatever it is that is leaking. Adding packing is part art and part science. The correct amount to add is however much it takes to stop the leak.
With the case of the hose bib, you can add packing around the stem and tighten the cap nut. If it still leaks, add a little more. Realize, that you may ultimately end up replacing the hose bib, but that would be as a last resort. Make sure after you add packing to the plumbing fixture, you tighten the cap nut back down enough. You wouldn’t want to have a leak simply because you didn’t adequately tighten the nut back down.
 Sometimes a handyman has to be innovative. When working under a kitchen sink, there are specialty plumbing angle valves you can use rather than using a saddle valve. If you are installing an icemaker line to the refrigerator, or adding a reverse-osmosis water system, you need to supply water to these items. Many people will use a saddle valve, which pierces an existing water line. These valves are prone to leaking and I really dislike them because of that. However, you can buy specialty valves that will allow you to supply water to various areas and be able to stop the flow of water with a handle.
If you have a standard cold water angle valve with one outlet under the sink, you can replace this with a three-way valve or even a dual-handle three way angle valve. These are unique and will give you the ability to stop water to one fixture while keeping it on at others.
A three way angle valve has one handle and two outlets. The handle can stop and start the flow of water at both outlets simultaneously. To get even more control over the flow of water, you can replace the valve with a dual handle-three way angle valve. With this type of valve, you can not only supply water to two separate fixtures, but you can start and stop the flow of water independently of the other. It has two outlets and two handles to control the flow of water.
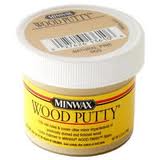 So you are doing carpentry work and you only measured once. Now you have a flaw that you need to hide. If you are making, for example a picture frame and you didn't cut the mitered corners accurately, you may have a gap. Wood putty can help.
If you are planning to paint the project, wood putty will work fine. However, if you are planning to stain and varnish the piece, I would buy more material and recut the piece. The reason for this is that wood putty doesn't accept stain like wood. Although it is made from wood, it tends to absorb more stain and will consequently be darker than the project. Your flaw will stand out.
Using wood putty is pretty easy. Use a small putty knife and mix it up in the container. Geta small amount on the putty knife and fill in the gaps. Less is better here. Use only enough to do the job as you will be sanding everything so that the surface is flush. Let is dry and sand it with a fine grit sandpaper. If everything is smooth then you are done. If you have any small imperfections, apply a small amount to fix it, let it dry, and then sand it until smooth.
 A Las Vegas water heater sees plenty of abuse. Intense heat and water as hard as a tax collector’s heart make up the daily life of a water heater. If you have a gas water heater, you also have a vent that carries the exhaust from the burner compartment to the exterior.
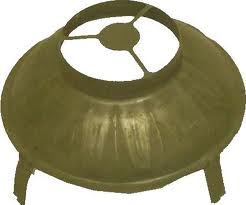
Every so often, we will come across a water heater vent that is not correctly secured. The draft hood has legs on it with tabs on the ends that slide into the top of the water heater. The hood is them rotated to engage the tabs. Connected to the draft hood is the vent. The vent should be secured to the draft hood. However, often I see that it is just sitting on it with nothing but friction holding it on.
The vent fits over the draft hood snuggly. I usually install 3 self-tapping screws into it through both the vent and the draft hood. You can use more than 3 screws, but I wouldn’t use less. After securing it with the screws, wrap the connection with metal tape. This area gets very hot so don’t use tape that could burn. Metal tape combined with the self tapping screws is a very reliable method to secure the vent assembly.
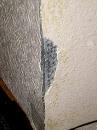 The corner of your drywall is prime real estate for damage. It sticks out like a sore thumb waiting for something to hit it. Most of the time it gets damaged, it is usually a dent or a scrape significant enough to remove paint and texture. I would rather fix it than replace it. Fixing it is not difficult.
Start off by removing any loose texture. If the metal corner is pushed out, it may be easy enough to use a hammer and tap it into place and fill in the void with drywall compound. Don’t worry about getting it exactly straight in line with the wall, let the joint compound do that. Use a putty knife and fill in the void and let it dry. You probably will have to do this on each side of the corner to get a nice square edge. Once this is dry you can sand it or use a damp sponge to form the corner. You likely will have to add a second coat and repeat.
When the corner is formed you can spray some texture on it to blend it in with the surrounding wall. If you can exactly match the paint then you can probably dab on the touch up paint. If you can’t match the paint, you may be forced to paint both of the walls that form the corner.
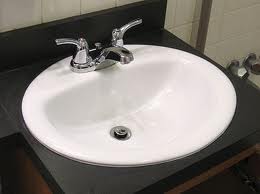 You probably don't need a handyman to remove you bathroom sink for you. If you are planning on replacing your bathroom sink, you can probably remove the old one from the vanity yourself. Depending upon the type of sink you have, this may be easy or challenging.
Once you have disconnected the drain and water supply lines, you can begin to remove the sink.
If you have a drop-in sink (one whose weight rests on its rim) the removal should be straightforward. These sinks are usually held in place by some clips underneath the countertop in the cabinet. Peek underneath the countertop and look for the clips. They can be removed by unscrewing them. This will allow you to lift the sink from the hole. Sinks are usually caulked in place as well, so before you try to lift it, use a utility knife and cut through the caulking. In addition to all of this, the sink may have adhesive underneath the lip where it rests on the countertop. If you are planning on keeping the countertop, be very gentle trying to goose up the sink from its hole. In many instances, I’ve seen the sink pull up ceramic tiles trying to remove it.
The same procedure goes for undermount sinks. Some have a combination of epoxy, adhesive, and clips to hold them to the underside of the countertop.