Replacing Florescent Light Bulbs
 Replacing florescent light bulbs sure seems like a no-brainer. There are a few different styles of bulbs and several different connections that might cause some confusion.
To access the light bulbs, you usually have to remove the plastic lens cover. With that gone you will have the bulbs ready to remove. The bulbs will either have 2 pins on each end or a rounded hub. These make contact with the electricity and illuminate the bulb.
Look at the connections where the ends of the bulbs meet the fixture. If you see a slot at the bottom of the connector, rotate the bulb until you see a pin. Look at each end of the bulb to make sure you see a pin at the bottom of each connector. At this point the pins will be in the 6 o’clock and 12 o’clock positions. Gently pull the bulb out of the fixture.
The other style has a small metal hub on each end. These are held in place by a spring in one of the connectors. Push the bulb to one side to retract the spring, pull the other side of the bulb out, and remove the bulb.
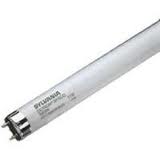
Make sure you buy the correct florescent bulb. There are many diameters and sizes, but it should be pretty obvious.
To reinstall the bulbs just reverse the procedure. With the pin-style, make sure both pins are into the connector before you try to twist it. If not, you can damage the connector and/or the bulb.